Sony DCR-PC110E - Manual de uso - Página 68
 2
2
 3
3
 4
4
 5
5
 6
6
 7
7
 8
8
 9
9
 10
10
 11
11
 12
12
 13
13
 14
14
 15
15
 16
16
 17
17
 18
18
 19
19
 20
20
 21
21
 22
22
 23
23
 24
24
 25
25
 26
26
 27
27
 28
28
 29
29
 30
30
 31
31
 32
32
 33
33
 34
34
 35
35
 36
36
 37
37
 38
38
 39
39
 40
40
 41
41
 42
42
 43
43
 44
44
 45
45
 46
46
 47
47
 48
48
 49
49
 50
50
 51
51
 52
52
 53
53
 54
54
 55
55
 56
56
 57
57
 58
58
 59
59
 60
60
 61
61
 62
62
 63
63
 64
64
 65
65
 66
66
 67
67
 68
68
 69
69
 70
70
 71
71
 72
72
 73
73
 74
74
 75
75
 76
76
 77
77
 78
78
 79
79
 80
80
 81
81
 82
82
 83
83
 84
84
 85
85
 86
86
 87
87
 88
88
 89
89
 90
90
 91
91
 92
92
 93
93
 94
94
 95
95
 96
96
 97
97
 98
98
 99
99
 100
100
 101
101
 102
102
 103
103
 104
104
 105
105
 106
106
 107
107
 108
108
 109
109
 110
110
 111
111
 112
112
 113
113
 114
114
 115
115
 116
116
 117
117
 118
118
 119
119
 120
120
 121
121
 122
122
 123
123
 124
124
 125
125
 126
126
 127
127
 128
128
 129
129
 130
130
 131
131
 132
132
 133
133
 134
134
 135
135
 136
136
 137
137
 138
138
 139
139
 140
140
 141
141
 142
142
 143
143
 144
144
 145
145
 146
146
 147
147
 148
148
 149
149

Índice:
- Página 90 – Salte os passos 3 e 4. Carregue em
- Página 91 – AUDIO DUB
- Página 92 – Para reproducir el sonido; Para reproduzir o som; Notas
- Página 95 – Para borrar el título; Confección de sus propios títulos; ] e então prima o anel para eliminar; Para eliminar o título
- Página 96 – CAMERA
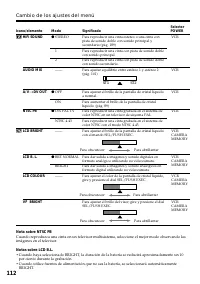
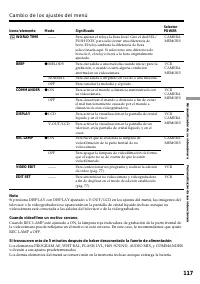
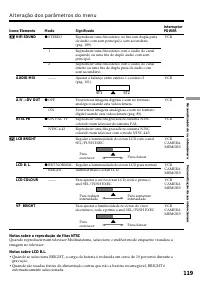
- Página 97 – Cambio de los ajustes del menú; Español; Selección del modo de ajuste de cada elemento; es el ajuste predeterminado.; . Su videocámara evitará la compensación
- Página 98 – Nota sobre NTSC PB; por ciento durante la grabación.
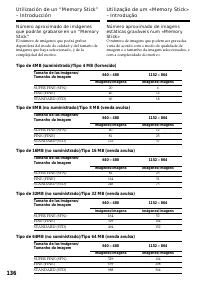
- Página 99 – Nota sobre IMAGESIZE
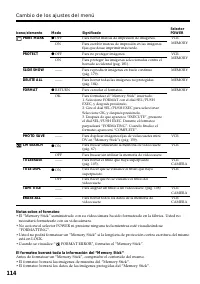
- Página 100 – Notas sobre el formateo; necesitará formatearlo con su videocámara.; El formateo borrará toda la información del “Memory Stick”
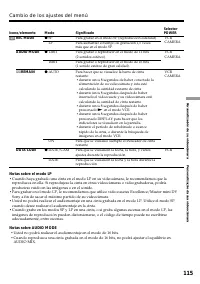
- Página 101 – Notas sobre el modo LP; Sony a fin de sacar el máximo partido de su videocámara.; Notas sobre AUDIO MODE
- Página 102 – Notas sobre DEMO MODE
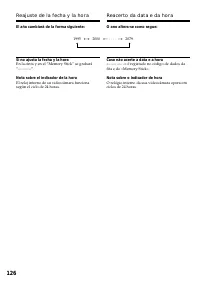
- Página 105 – Reajuste de la fecha y la hora; Caso não acerte a data e a hora; Reacerto da data e da hora
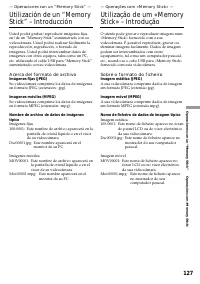
- Página 106 – — Operaciones con un “Memory Stick” —; Acerca del formato de archivo; Dsc00001.jpg: Este nombre aparecerá en el; Sobre o formato do ficheiro; Nome de ficheiro de dados de imagem típico; Dsc00001.jpg: Este nome de ficheiro aparece no
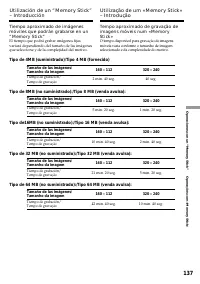
- Página 110 – Tempo de gravação
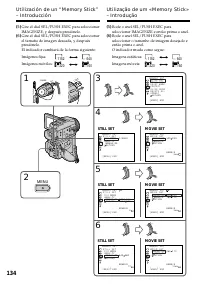
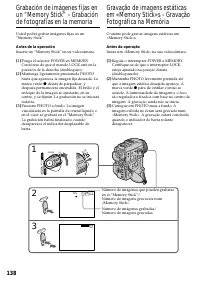
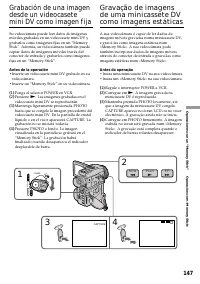
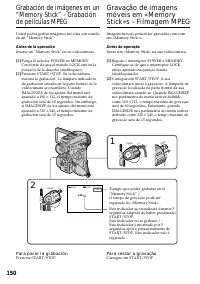
- Página 111 – Antes de la operación; Inserte un “Memory Stick” en su videocámara.; Antes da operação; Insira um «Memory Stick» na sua videocâmara.
- Página 112 – – Modo de aprendizaje de deportes (El indicador
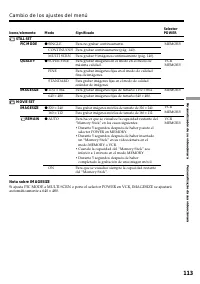
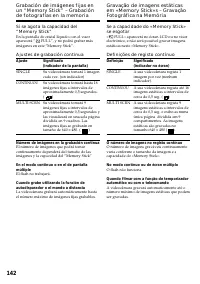
- Página 113 – Ajustes de grabación continua; Ajuste; Definições de registo contínuo; Definição
- Página 115 – Para parar la grabación
- Página 116 – El sonido se grabará en forma monoaural.
- Página 121 – MEMORY
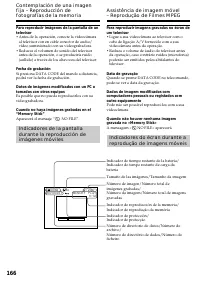
- Página 126 – Fecha de grabación
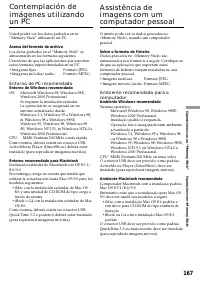
- Página 127 – Entorno de PC recomendado
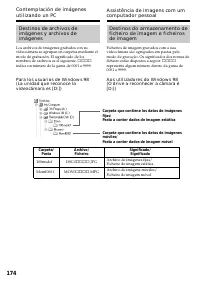
- Página 128 – Pasta; ssss
- Página 129 – Usted no podrá grabar la pantalla de índice.; Durante a cópia; Não é possível gravar o écran de índex.
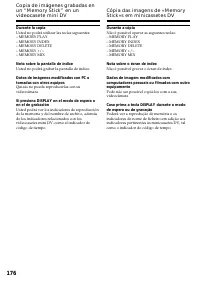
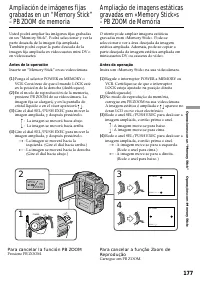
- Página 130 – Para cancelar la función PB ZOOM
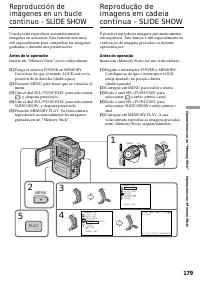
- Página 132 – Presione MEMORY PLAY.; Para cessar a mostra de diapositivos; Carregue em MEMORY PLAY.; Para ver as imagens gravadas no televisor
- Página 134 – Imágenes móviles
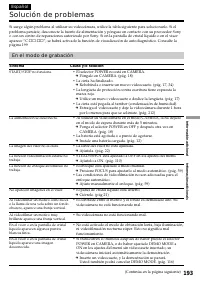
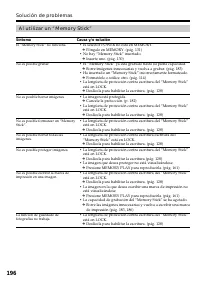
- Página 135 – Solución de problemas; ss; En el modo de grabación; Síntoma; La alimentación se desconecta.
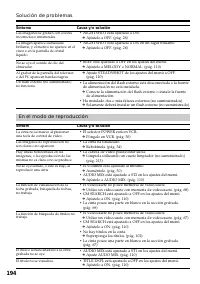
- Página 136 – En el modo de reproducción; Síntom; El título no se visualiza.
- Página 138 – El “Memory Stick” no funciona.
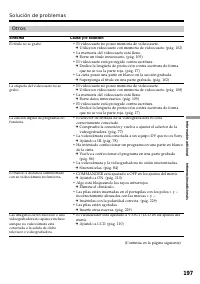
- Página 139 – Otros; El título no se grabó.
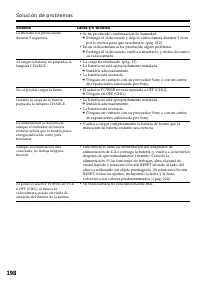
- Página 140 – No es posible cargar la batría.
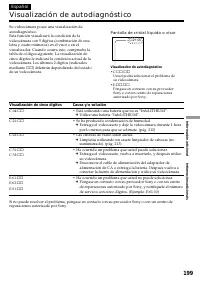
- Página 141 – Visualización de cinco dígitos; Visualización de autodiagnóstico
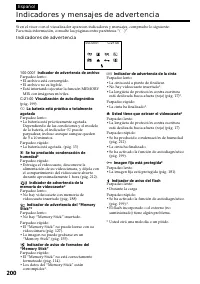
- Página 142 – Indicadores y mensajes de advertencia; MIX con imágenes móviles.; Indicadores de advertencia; • El flash incorporado o el externo (no
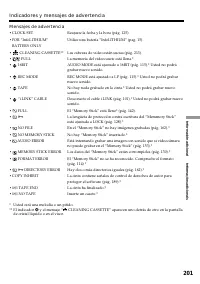
- Página 143 – Mensajes de advertencia
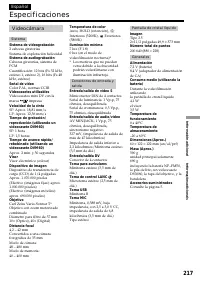
- Página 144 – Especificaciones; Videocámara
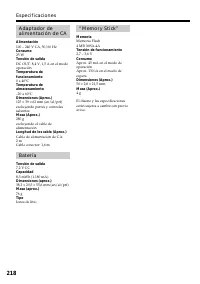
- Página 145 – Iones de litio
- Página 147 – Guía rápida de funciones; Funciones para ajustar la exposición (en el modo de grabación)
- Página 148 – Índice alfabético
74
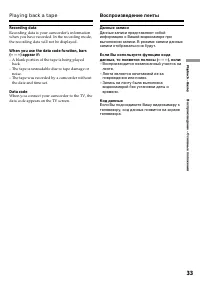
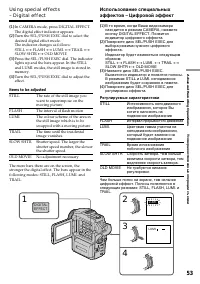
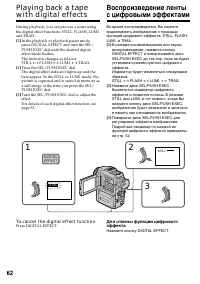
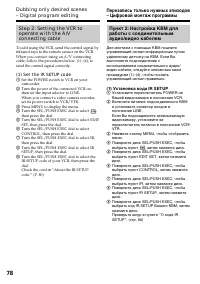
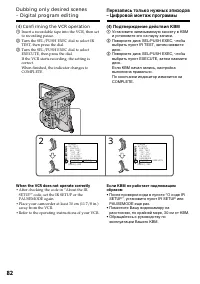
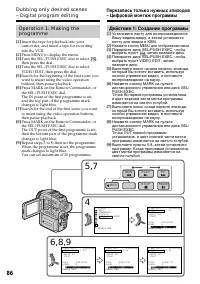
Before a dubbing
Set DISPLAY to LCD in the menu settings. (The
default setting is LCD.)
Be sure to clear the indicators from the screen
If they are displayed, press the following buttons
not to record the indicators on the dubbed tape:
– DISPLAY
– DATA CODE on the Remote Commander
– SEARCH MODE on the Remote Commander
You can edit on VCRs that support the
following systems
8 mm,
Hi8,
VHS,
S-VHS,
VHSC,
S-VHSC, Betamax,
mini
DV,
DV, Digital8
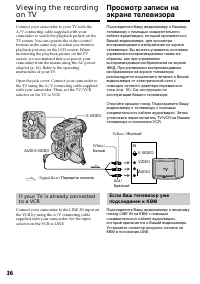
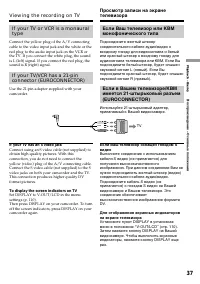
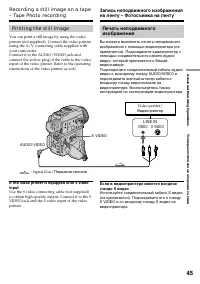
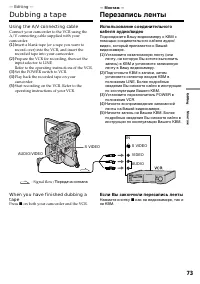
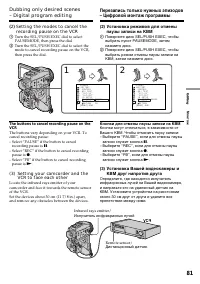
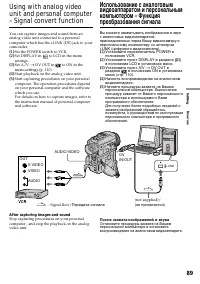
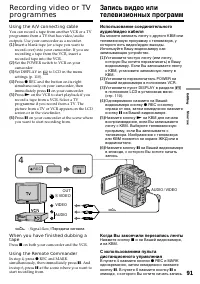
If your VCR is a monaural type
Connect the yellow plug of the A/V connecting
cable to the video input jack and the white or the
red plug to the audio input jack on the VCR or
the TV. When the white plug is connected, the
left channel audio is output, and the red plug is
connected, the right channel audio is output.
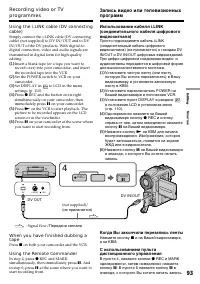
If your VCR has an S video jack
Connect using an S video cable (not supplied) to
obtain high-quality pictures.
With this connection, you do not need to connect
the yellow (video) plug of the A/V connecting
cable.
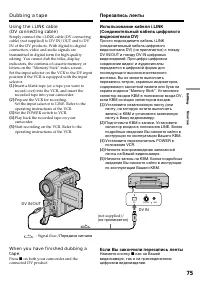
Connect an S video cable (not supplied) to the S
video jacks of both your camcorder and the VCR.
This connection produces higher quality DV
format pictures.
Dubbing a tape
Перезапись ленты
До начала перезаписи
Установите пункт DISPLAY в положение LCD
в установках меню. (По умолчанию
установлено положение LCD).
Убедитесь, что индикаторы исчезли с
экрана
Если они отображаются, нажимайте
следующие кнопки, чтобы они не были
наложены на монтажную ленту:
– DISPLAY
– DATA CODE на пульте дистанционного
управления
– SEARCH MODE на пульте дистанционного
управления
Вы можете выполнять монтаж на КВМ,
которые поддерживают следующие
системы
8 мм,
Hi8,
VHS,
S-VHS,
VHSC,
S-VHSC, Betamax,
mini
DV,
DV, Digital8
Если Ваш КВМ монофонического типа
Подсоедините желтый штекер
соединительного кабеля аудио/видео к
входному видеогнезду, а белый или красный
штекер к входному аудиогнезду на КВМ или
телевизоре. Если подсоединен белый
штекер, то выходным сигналом будет звук
левого канала, а если подсоединен красный
штекер, то выходным сигналом будет звук
правого канала.
Если Ваш КВМ оснащён гнездом S видео
Выполните подсоединение с помощью кабеля
S видео (не прилагается) для получения
высококачественных изображений
При таком подсоединении Вам не нужно
подсоединять желтый (видео) штекер
соединительного кабеля аудио/видео.
Подсоедините кабель S видео (не
прилагается) к гнездам S видео на Вашей
видеокамере и КВМ. Это соединение
обеспечивает высококачественное
изображение формата DV.
"Cargando la instrucción" significa que debes esperar hasta que el archivo se cargue y puedas leerlo en línea. Algunas instrucciones son muy grandes y el tiempo de carga depende de la velocidad de tu conexión a Internet.
Resumen
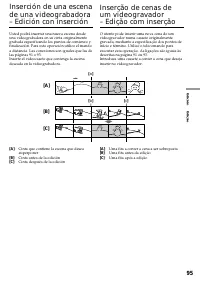
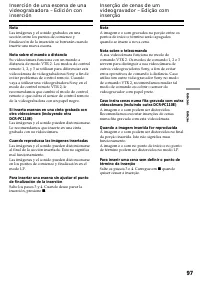
97 Edición Edição Nota Las imágenes y el sonido grabados en unasección entre los puntos de comienzo yfinalización de la inserción se borrarán cuandoinserte una nueva escena. Nota sobre el mando a distancia Su videocámara funciona con un mando adistancia de modo VTR 2. Los modos de controlremoto 1, 2...
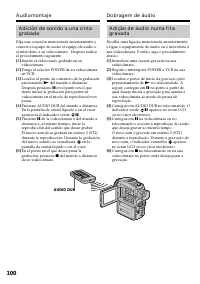
100 Adición de sonido a una cintagrabada Elija una conexión mencionada anteriormente yconecte el equipo de audio el equipo de audio oel micrófono a su videocámara. Después realiceel procedimiento siguiente. ( 1 ) Inserte el videocasete grabado en suvideocámara. ( 2 ) Ponga el selector POWER de su vi...
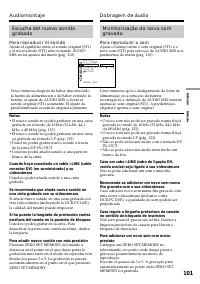
101 Edición Edição Escucha del nuevo sonidograbado Para reproducir el sonido Ajuste el equilibrio entre el sonido original (ST1)y el nivel sonido (ST2) seleccionando AUDIOMIX en los ajustes del menú (pág. 110). Cinco minutos después de haber desconectadola fuente de alimentación o de haber extraído ...