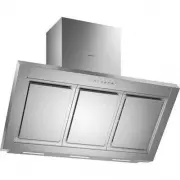
Installation; Consignes de sécurité; fr - Gaggenau AW 250-191 - Manual de uso - Página 6

10
Installation
The extractor hood is intended to be mounted
onto the kitchen wall.
1
Remove the edge extraction segments and
the grease filters ( as described in the
operating instructions
2
Draw a line on the wall from the ceiling to the
lower edge of the hood at the centre of the
location where the hood is going to be
mounted.
3
Use the template to mark the points on the
wall where the screws will be mounted. In
order to make it easier to hook the hood onto
the screws, draw the outline of the area
where the hood will be attached.
Ensure that the minimum distance between
the hob and the extractor hood is maintained
– 550 mm for an electric hob and 650 mm for
a gas hob. The bottom edge of the template
equates to the lower edge of the extractor
hood.
4
Drill holes for the extractor hood and holes
for the chimney panelling. Insert plugs into
the holes so that they are flush with the wall.
Fig. 4.
5
Screw on the mounting hooks with the
angled part facing outwards. Fig 4.
6
Screw the support screws.
7
Rest the back of the hood on the wall and let
the hood enter the corresponding slots.
8
Holding the cross notched screwdriver in
your hand, slowly screw up the 2 horizontal
alignment screws, until the hood is perfectly
horizontal above the cooker hob. Fig.5.
9
Insert and fix with the screw-driver the safety
screws.
10
Insert the screws in the holes of the upper
chimney bracket and screw them in the
plugs.
11
Connect the hood to electricity supply.
12
Connect the air outlet pipe.
13
Mount the 2 parts of the chimney fixing on
the side the upper part with 2 screws at the
chimney bracket and the lower part with 5
screws at the body of the hood.
Consignes de sécurité
Attention ! Ne pas coincer le cordon d’
alimentation au moment du montage.
Attention! Ne pas brancher l’ appareil au
secteur tant qu’ il n’est pas monté.
Le branchement et la mise en servicec de l’
appareil doivente être effectués uniquement par un
technicien autorisé. Respecter la notice de
montage et les normes locales d’ installation.
Expliquer à l’ utilisateur comment il peut mettre l’
appareil hors tension en cas de nécessité.
Remarques importantes
Les anciens appareils ne sont pas des déchet
sans valeur. Leur élimination respectueuse de l’
environnement permet de récuperer de précieuses
matières premières.
Avant de vous débarrasser de l’ appreil, rendez.-le
inutilisable.
Pour vous parvenir en parfait état, votre nouvel
appareil a été conditionné dans un emballage qui
le protège efficacement. Tous les matériaux d’
emballage utilisés sont compatibles avec l’
environnement et recyclables. Aidez-nous à
èliminer l’ emballage en respectant l’
environnement.
Demandez à votre revendeur ou à votre mairie
quelles sont les formes de recyclage actuellement
possibles.
Cette hotte peut évacuer l’ air à l’ extérieur.
Fixex toujours la hotte bien centrée au-dessus des
foyers de la table de cuisson.
L’ écart minimum entre les foyers électriques et le
bord inférieur de la hotte doit être de
550 mm
, voir
fig.2
Au-dessus d’ un foyer à combustible solide
génératuer d’ un risque d’ incendie (par projection
d’ etincelles par ex.) le montage de la hotte ne
sera admis que si ce foyer est équipé d’ un
fr
"Cargando la instrucción" significa que debes esperar hasta que el archivo se cargue y puedas leerlo en línea. Algunas instrucciones son muy grandes y el tiempo de carga depende de la velocidad de tu conexión a Internet.


