Cosmo C51EIX - Manual de uso - Página 6


23(5$7,21
,16758&7,216
:KHQ
WKH
RYHQ
LV
ILUVW
FRQQHFWHG
WR
WKH
HOHFWULFDO
VXSSO\
ZDLW
IRU
WKH
GLVSOD\
DXWRPDWLFDOO\
VKRZ
D EHHS VRXQG RQFH DQG WKH
IODVK (QVXUH WKH
FRUUHFW WLPH RI
WKH
GD\LVVHW EHIRUHXVLQJ WKHRYHQ
3
OHDVHQRWH
WKHUHDUHWZRNLQGVRIWLPHUVWKHKRXUFORFNDQGWKHKRXUFORFNGHSHQGLQJRQWKH
DFWXDOPDFKLQH
)RUH[DPSOHZLWKDKRXUFORFN
30VKRZQDV
9
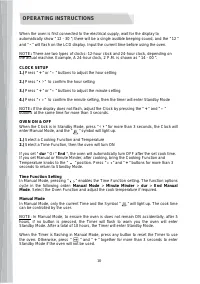
7LPH IXQFWLRQ VHWWLQJ
7RVHWWKHFRUUHFWWLPHRIGD\
! 3UHVVEXWWRQ WRDGMXVWWKHKRXUVHWWLQJ
! 3UHVV WRFRQILUPWKHKRXUVHWWLQJ
! 3UHVVEXWWRQWRDGMXVWWKHPLQXWHVHWWLQJ
!
3UHVV
WRFRQILUPWKHPLQXWHVHWWLQJDQG
WKHWLPHUZLOOEHLQVWDQGE\PRGH
1RWH ,I WKH GLVSOD\ GRHV QRW IODVK DGMXVW WKH WLPH RI GD\ E\ SUHVVLQJ WKH DQG EXWWRQV DW
WKH VDPHWLPHIRUPRUHWKDQVHFRQGV
0DQXDOPRGH
,Q PDQXDO PRGH RQO\ WKH GD\V WLPH DQG WKH V\PERO OLJKWV XS 7KH FRRNLQJ GXUDWLRQ KDV WR
EHFRQWUROOHGE\WKHXVHU
1RWHV ,Q PDQXDO PRGH WR HQVXUH WKH RYHQ LV QRW OHIW RQ DFFLGHQWDOO\ DIWHU KRXUV QR DQ\ EXWWRQ
SUHVVHGWKHWLPHUZLOOIODVKRQFHDVHFRQGWRZDUQ\RXWKHRYHQZLOOHQWHUVWDQGE\PRGH$IWHUDWRWDORI
KRXUVWKHWLPHUZLOOHQWHUVWDQGE\PRGH
:KHQWKHWLPHULVIODVKLQJLQPDQXDOPRGHSUHVVDQ\EXWWRQ WR UHVHW WKH WLPHU LI \RX LQWHQG WR FRQWLQXH
XVLQJWKHRYHQ2USUHVV DQG
WRJHWKHUIRUPRUHWKDQVHFRQGVWRHQWHUVWDQGE\PRGHLI
RYHQZLOOQRWEHXVHG
2YHQ2QDQG2II
,I WKH WLPHU LV LQ VWDQGE\ PRGH
ˈ
SUHVV
IRU PRUH WKDQ VHFRQGV WKH WLPHU ZLOO HQWHU PDQXDO
PRGHDQG WKHV\PERO ZLOOOLJKWXSFRQWLQXRXVO\
!
6HWWKHGHVLUHGFRRNLQJIXQFWLRQDQGWKHWHPSHUDWXUHGHJUHH
!
6HWWKHWLPHIXQFWLRQWKHQWKHRYHQZLOORQ
,I\RXVHW
G
XURU(QGDIWHUFRRNLQJ WKHRYHQZLOODXWRPDWLFDOO\WXUQRII
,I\RXVHWPDQXDORUPLQXWHPLQGHUDIWHUFRRNLQJEULQJWKHFRRNLQJIXQFWLRQDQGRYHQWHPSHUDWXUH
NQREWRSRVLWLRQ3UHVV
DQGEXWWRQVIRUPRUHWKDQVHFRQGVWRUHWXUQWRVWDQGE\PRGH
FDQHQWHUWKHWLPHIXQFWLRQVHWWLQJWKHVHTXHQFHRIWKHIXQFWLRQ
,QPDQXDOPRGHSUHVVLQJ
VHWWLQJLV0DPXDOPRGH0LQXWHPLQGHU
G
XU(QG0DQXDOPRGH7KHQVHOHFWHGFRRNLQJIXQFWLRQ
DQGDGMXVWWKHFRRNWHPSHUDWXUHLIUHTXLUHG
IMPORTANT
If the oven is to work properly, the cabinet housing the oven is installed
into must be suitable for oven use. The panels of the cabinet housing that are
next to the oven must be made of a heat-resistant material. Ensure that the
glue of units made of veneered wood can withstand temperatures of at least
250 °F. Plastic or glues that cannot withstand such temperatures will melt
and deform the cabinet housing. Once the oven has been installed into the
cabinet housing, the electric parts must be completely insulated; this is a le-
gal safety requirement. All guards must be firmly fixed into place so that it is
impossible to remove them without using special tools. Remove the back of
the cabinet unit to ensure an adequate current of air circulates around the
oven. The oven must have a rear gap of at least 45mm.
When you have unpacked the oven, make sure that it has not been damaged in
any way. If you have any doubts at all, do not attempt to use it, and contact
professionally qualified personnel for assistance.
Keep all packing materials such as plastic bags, polystyrene or nails out of the
reach of children.
7
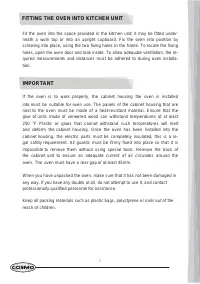
FITTING THE OVEN INTO KITCHEN UNIT
Fit the oven into the space provided in the kitchen unit; it may be fitted under-
neath a work top or into an upright cupboard. Fix the oven into position by
screwing into place, using the two fixing holes in the frame. To locate the fixing
holes, open the oven door and look inside. To allow adequate ventilation, the re-
quired measurements and distances must be adhered to during oven installa-
tion.
"Cargando la instrucción" significa que debes esperar hasta que el archivo se cargue y puedas leerlo en línea. Algunas instrucciones son muy grandes y el tiempo de carga depende de la velocidad de tu conexión a Internet.
Otros modelos de hornos Cosmo
-
 Cosmo C106SIX-PT
-
 Cosmo COS-30EDWC
-
 Cosmo COS-30ESWC