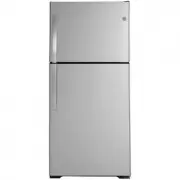
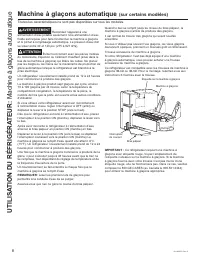
GE GTS19KYNRFS - Manual de uso - Página 5


Índice:
- Página 18 – GARANTÍA LIMITADA; REFRIGERADORS; Congelador superior
- Página 19 – GRACIAS POR HACER QUE GE APPLIANCES SEA PARTE DE SU HOGAR.; tenerlo en la familia.
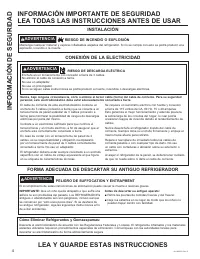
- Página 20 – PRECAUCIÓN; ADVERTENCIA; RIESGO DE INCENDIO O EXPLOSIÓN Refrigerantes Inflamables
- Página 21 – FORMA ADECUADA DE DESCARTAR SU ANTIGUO REFRIGERADOR; PELIGRO DE SUFFOCATION Y ENTRAPMENT; Cómo Eliminar Refrigerantes y Gomaespumas:; CONEXIÓN DE LA ELECTRICIDAD; INFORMACIÓN DE SEGURIDAD; LEA Y GUARDE ESTAS INSTRUCCIONES; INSTALACIÓN; RIESGO DE INCENDIO O EXPLOSIÓN
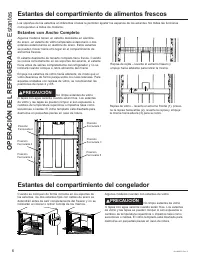
- Página 23 – Estantes; Estantes del compartimiento de alimentos frescos; Estantes con Ancho Completo
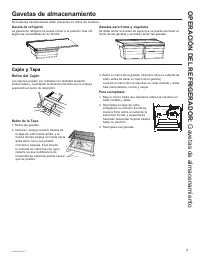
- Página 24 – Cajón y Tapa; Retiro del Cajón; Gavetas de almacenamiento
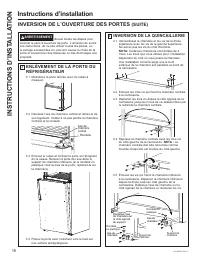
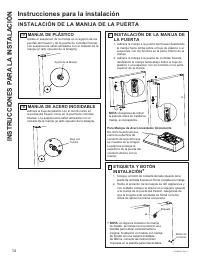
- Página 31 – INSTALACIÓN DE LA MANIJA DE LA PUERTA
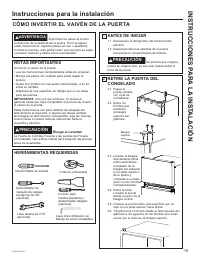
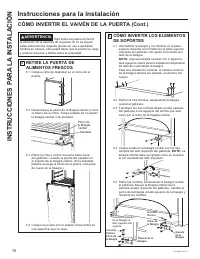
- Página 33 – CÓMO INVERTIR LOS ELEMENTOS
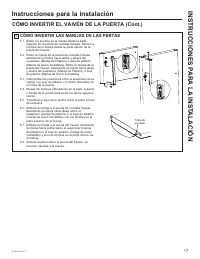
- Página 34 – CÓMO INVERTIR LAS MANIJAS DE LAS PERTAS
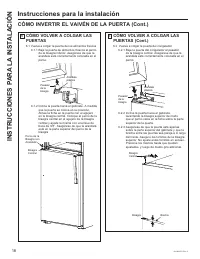
- Página 35 – CÓMO VOLVER A COLGAR LAS
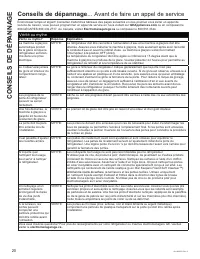
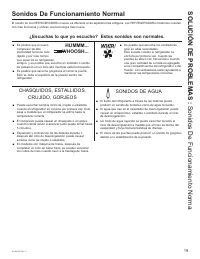
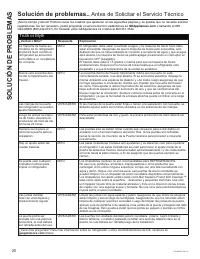
- Página 36 – Sonidos De Funcionamiento Normal; ¿Escuchas lo que yo escucho? Estos sonidos son normales.; SOLUCIÓN DE PROBLEMAS :
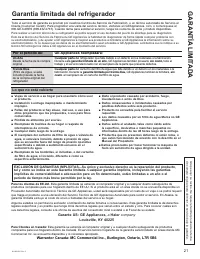
- Página 38 – *DUDQWtDOLPLWDGDGHOUHIULJHUDGRU; Lo que no está cubierto; RUHOSHUtRGRGH
- Página 41 – Soporte para el Consumidor
49-1000478 Rev. 2
13
INST
ALLA
TION INSTRUCTIONS
Installation Instructions
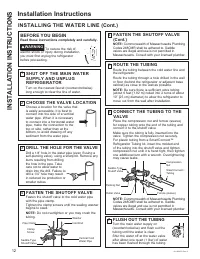
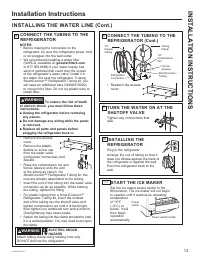
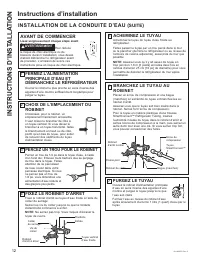
INSTALLING THE WATER LINE (Cont.)
8
CONNECT THE TUBING TO THE
REFRIGERATOR
NOTES:
•
Before making the connection to the
refrigerator, be sure the refrigerator power cord
is not plugged into the wall outlet.
•
We recommend installing a water filter
*;5/4DYDLODEOHRQ
gewaterfilters.com
or 877.959.8688) if your water supply has
sand or particles that could clog the screen
RIWKHUHIULJHUDWRU¶VZDWHUYDOYH,QVWDOOLWLQ
WKHZDWHUOLQHQHDUWKHUHIULJHUDWRU,IXVLQJ
6PDUW&RQQHFW5HIULJHUDWRU7XELQJNLW\RX
ZLOOQHHGDQDGGLWLRQDOWXEH:;;
WRFRQQHFWWKHILOWHU'RQRWFXWSODVWLFWXEHWR
install filter.
WARNING
To reduce the risk of death
or electric shock, you must follow these
instructions:
Ŷ
Unplug the refrigerator before removing
any panels.
Ŷ
Do not damage any wiring while the panel
is removed.
Ŷ
Replace all parts and panels before
plugging the refrigerator back in.
•
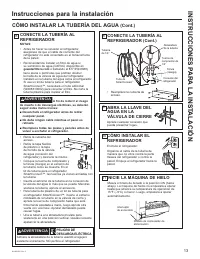
Remove the access
cover.
•
Remove the plastic
flexible or screw cap
from the water valve
(refrigerator connection) and
discard.
•
Place the compression nut and
ferrule (sleeve) onto the end
of the tubing as shown. On
6PDUW&RQQHFW5HIULJHUDWRU7XELQJNLWWKH
nuts are already assembled to the tubing.
,QVHUWWKHHQGRIWKHWXELQJLQWRWKHZDWHUYDOYH
connection as far as possible. While holding
the tubing, tighten the fitting.
)RUSODVWLFWXELQJIURPD6PDUW&RQQHFW
Refrigerator Tubing kit, insert the molded
end of the tubing into the shutoff valve and
tighten compression nut until it is hand tight,
then tighten one additional turn with a wrench.
Overtightening may cause leaks.
•
Fasten the tubing into the clamp provided to hold
it in a vertical position. You may need to pry open
the clamp.
9
TURN THE WATER ON AT THE
SHUTOFF VALVE
Tighten any connections that
leak.
8
CONNECT THE TUBING TO THE
REFRIGERATOR (Cont.)
•
Reattach the access
cover.
Tubing
Clamp
´
Compression
Nut
Ferrule
(sleeve)
SmartConnect
Tubing
Refrigerator
Connection
´
Copper
Tubing
10
INSTALLING THE
REFRIGERATOR
Plug in the refrigerator.
Arrange the coil of tubing so that it
does not vibrate against the back of
the refrigerator or against the wall.
Push the refrigerator back to the
wall.
11
START THE ICE MAKER
Set the ice maker power switch to the
0N position. The ice maker will not begin
to operate until it reaches its operating
temperature
of 15°F
(–9°C) or
EHORZ,WZLOO
then begin
operation
automatically.
ON OFF
Power
switch
Power switch model
WARNING
ELECTRIC SHOCK
HAZARD
Attach tubing clamp using existing hole only.
'2127GULOOLQWRWKHUHIULJHUDWRU
"Cargando la instrucción" significa que debes esperar hasta que el archivo se cargue y puedas leerlo en línea. Algunas instrucciones son muy grandes y el tiempo de carga depende de la velocidad de tu conexión a Internet.
Resumen
INFORMACIÓN DE SEGURIDAD . . . . . . . . . . . . . . . . . . . 3 OPERACIÓN DEL REFRIGERADOR Control . . . . . . . . . . . . . . . . . . . . . . . . . . . . . . . 5 Modo Sabático . . . . . . . . . . . . . . . . . . . . . . . . 5 Funcionamiento en Garaje . . . . . . . . . . . . . . 5Estantes del co...
2 49-1000478 Rev. 2 GRACIAS POR HACER QUE GE APPLIANCES SEA PARTE DE SU HOGAR. Ya sea que haya crecido usando GE Appliances, o que ésta es su primera vez, nos complace tenerlo en la familia. Sentimos orgullo por el nivel de arte, innovación y diseño de cada uno de los electrodomésticos de GE Applian...
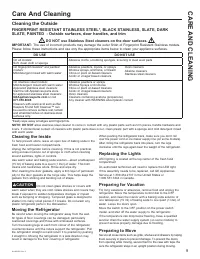
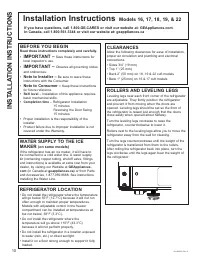
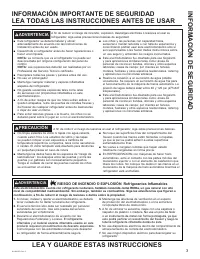
49-1000478 Rev. 2 3 INFORMACIÓN DE SEGURIDAD LEA Y GUARDE ESTAS INSTRUCCIONES INFORMACIÓN IMPORTANTE DE SEGURIDADLEA TODAS LAS INSTRUCCIONES ANTES DE USAR PRECAUCIÓN A fin de reducir el riesgo de lesiones al usar el refrigerador, siga estas precauciones básicas. Ŷ 1ROLPSLHHVWDQWHVGHYLGULRQLWDSDVFRQ...
Otros modelos de frigoríficos GE
-
 GE GFD28GELDS
-
 GE GFD28GYNFS
-
 GE GFE28GELDS
-
 GE GFE28GYNFS
-
 GE GIE17GSNRSS
-
 GE GIE18DTNRBB
-
GE GIE18DTNRWW
-
 GE GIE18GCNRSA
-
GE GIE18GSNRSS
-
GE GIE18GTNRBB