GE PWS06DSPSS - Manual de uso - Página 4
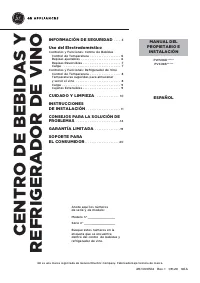
Índice:
- Página 12 – complace tenerlo en la familia.
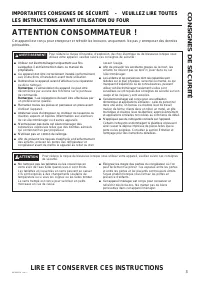
- Página 13 – PRECAUCIÓN; ADVERTENCIA
- Página 14 – CONEXIÓN DE LA ELECTRICIDAD; Riesgo de Explosión; RIESGO DE INCENDIO O EXPLOSIÓN Refrigerantes Inflamables
- Página 15 – FORMA ADECUADA DE DESCARTAR SU ANTIGUO REFRIGERADOR; Cómo Eliminar Refrigerantes y Gomaespumas:
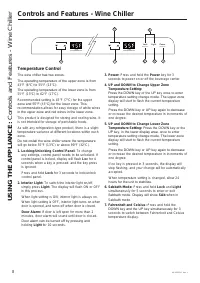
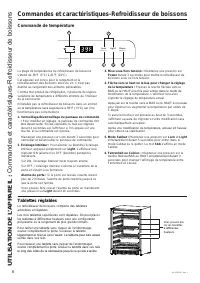
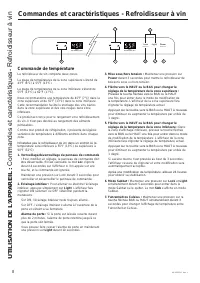
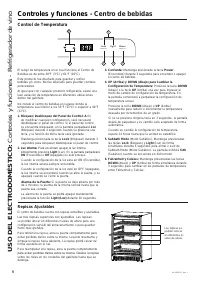
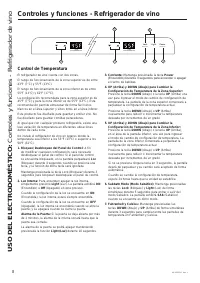
- Página 16 – USO DEL; Controles y funciones - Refrigerador de vino; Controles y funciones; Repisas Ajustables; Control de Temperatura
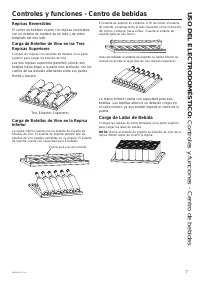
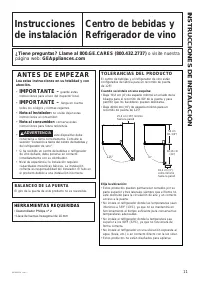
- Página 17 – Controles y funciones - Centro de bebidas; Repisas Reversibles; Carga de Latas de Bebida
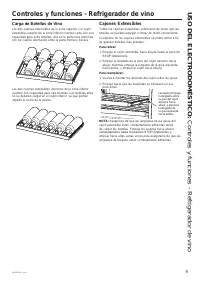
- Página 19 – Carga de Botellas de Vino; Cajones Extensibles
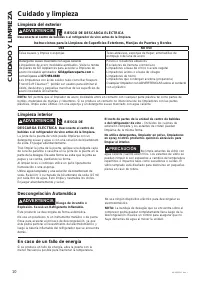
- Página 20 – En caso de un fallo de energía; Limpieza interior; Descongelación Automática
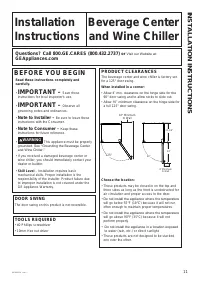
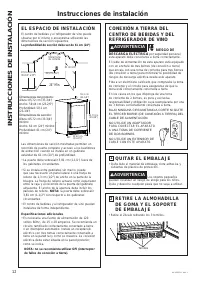
- Página 22 – EL ESPACIO DE INSTALACIÓN; QUITAR EL EMBALAJE; RETIRE LA ALMOHADILLA
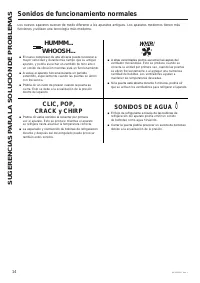
- Página 24 – CRACK y CHIRP
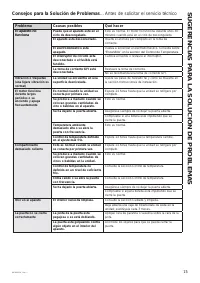
- Página 25 – Problema; Consejos para la Solución de Problemas; Antes de solicitar el servicio técnico
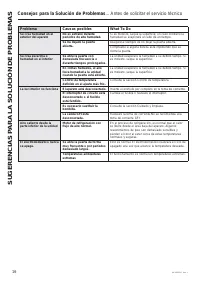
- Página 26 – SUGERENCIAS P
- Página 29 – Lo que GE Appliances no cubrirá:; GARANTÍA; Garantía Limitada GE Appliances; EXCLUSIÓN DE GARANTÍAS IMPLÍCITAS; Para los clientes de Canadá :
49-1000514 Rev. 1
13
Installation Instructions
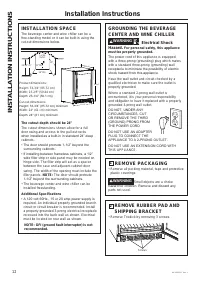
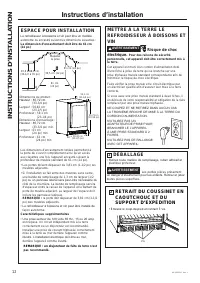
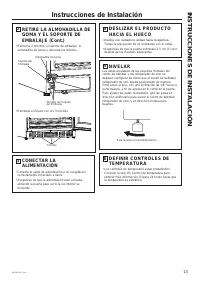
5
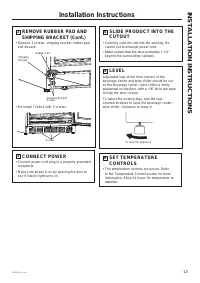
LEVEL
Adjustable legs at the front corners of the
beverage center and wine chiller should be set
so the beverage center / wine chiller is firmly
SRVLWLRQHGRQWKHIORRUZLWKD´WLOWWRWKHEDFN
to help the door closure.
To adjust the leveling legs, turn the legs
counterclockwise to raise the beverage center /
wine chiller, clockwise to lower it.
6
SET TEMPERATURE
CONTROLS
• The temperature controls are preset. Refer
to the Temperature Control section for more
information. Allow 24 hours for temperature to
VWDELOL]H
4
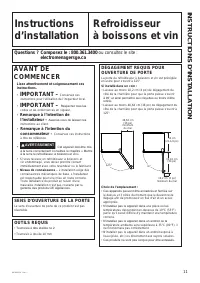
SLIDE PRODUCT INTO THE
CUTOUT
• Carefully slide the unit into the opening. Be
careful not to entangle power cord.
0DNHFHUWDLQWKDWWKHGRRUSURWUXGHV´
beyond the surrounding cabinets.
To raise the appliance
INSTALLATION INSTRUCTIONS
3
CONNECT POWER
• Connect power cord plug to a properly grounded
receptacle.
• Make sure power is on by opening the door to
see if interior light turns on.
2
REMOVE RUBBER PAD AND
SHIPPING BRACKET (Cont.)
• Remove 2 screws, shipping bracket, rubber pad
and discard.
• Re-install Toekick with 3 screws.
Rubber Pad
Shipping Bracket
Screws
Shipping
Bracket
Screws
"Cargando la instrucción" significa que debes esperar hasta que el archivo se cargue y puedas leerlo en línea. Algunas instrucciones son muy grandes y el tiempo de carga depende de la velocidad de tu conexión a Internet.
Resumen
2 49-1000514 Rev. 1 GRACIAS POR HACER QUE LOS ELECTRODOMÉSTICOS GE SEAN PARTE DE SU HOGAR. Ya sea que haya crecido usando Electrodomésticos GE, o que ésta es su primera vez, nos complace tenerlo en la familia. Sentimos orgullo por el nivel de arte, innovación y diseño de cada uno de los Electrodomé...
49-1000514 Rev. 1 3 READ AND SAVE THESE INSTRUCTIONS INFORMACIÓN IMPORTANTE DE SEGURIDADLEA TODAS LAS INSTRUCCIONES ANTES DEL USO INFORMACIÓN DE SEGURIDAD ATENCIÓN CONSUMIDOR! Este aparato está diseñado para guardar y refrigerar bebidas. No guarde alimentos perecederos en esta unidad. PRECAUCIÓN A...
4 49-1000514 Rev. 1 LEA Y GUARDE ESTAS INSTRUCCIONES INFORMACIÓN DE SEGURIDAD INFORMACIÓN IMPORTANTE DE SEGURIDADLEA TODAS LAS INSTRUCCIONES ANTES DEL USO CONEXIÓN DE LA ELECTRICIDAD Nunca, bajo ninguna circunstancia, corte o elimine el tercer cable (tierra) del cable de corriente. Para su segurida...