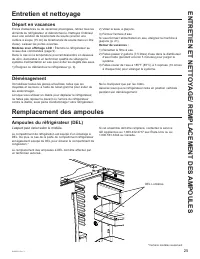
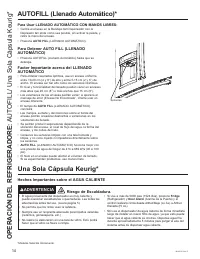
GE PYD22KYNFS - Manual de uso - Página 7


28
49-60792 Rev. 3
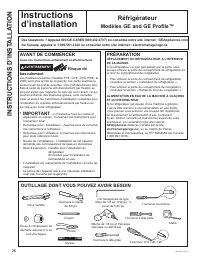
Installation Instructions
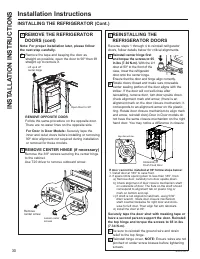
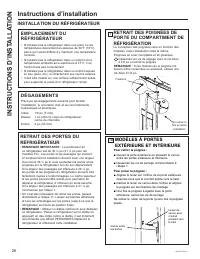
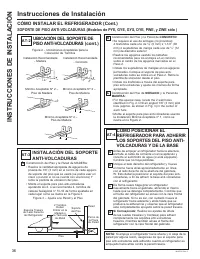
INSTALLING THE REFRIGERATOR
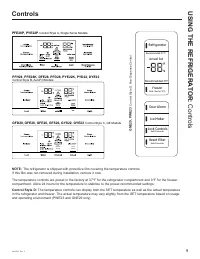
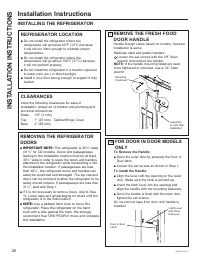
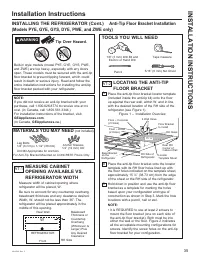
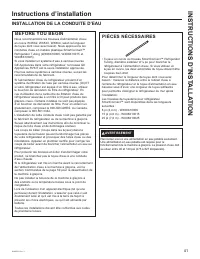
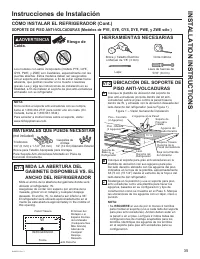
REFRIGERATOR LOCATION
Ŷ'RQRWLQVWDOOWKHUHIULJHUDWRUZKHUHWKH
WHPSHUDWXUHZLOOJREHORZ)&EHFDXVH
it will not run often enough to maintain proper
temperatures.
Ŷ'RQRWLQVWDOOWKHUHIULJHUDWRUZKHUHWKH
WHPSHUDWXUHZLOOJRDERYH)&EHFDXVH
it will not perform properly.
Ŷ
'RQRWLQVWDOOWKHUHIULJHUDWRULQDORFDWLRQH[SRVHG
WRZDWHUUDLQHWFRUGLUHFWVXQOLJKW
Ŷ,QVWDOOLWRQDIORRUVWURQJHQRXJKWRVXSSRUWLWIXOO\
loaded.
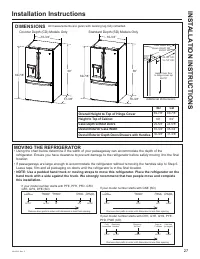
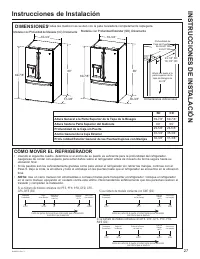
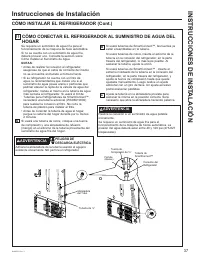
CLEARANCES
Allow the following clearances for ease of
installation, proper air circulation and plumbing and
electrical connections.
6LGHV
´PP
7RS
´PP&DELQHW+LQJH&RYHU
%DFN
´PP
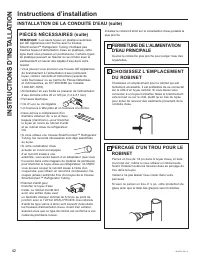
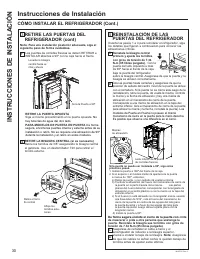
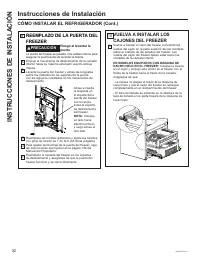
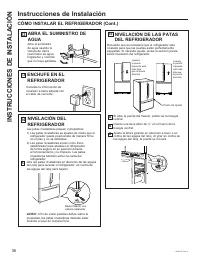
REMOVING THE REFRIGERATOR
DOORS
Ŷ
IMPORTANT NOTE:
This refrigerator is 36
1
4
´GHHS
(31
1
4
´IRU&'PRGHOV'RRUVDQGSDVVDJHZD\V
leading to the installation location must be at least
36
1
4
´ZLGHLQRUGHUWROHDYHWKHGRRUVDQGKDQGOHV
attached to the refrigerator while transporting it into
WKHLQVWDOODWLRQORFDWLRQ,ISDVVDJHZD\VDUHOHVV
than 36
1
4
´WKHUHIULJHUDWRUGRRUVDQGKDQGOHVFDQ
easily be scratched and damaged. The top cap and
doors can be removed to allow the refrigerator to be
VDIHO\PRYHGLQGRRUV,ISDVVDJHZD\VDUHOHVVWKDQ
31
1
4
´VWDUWZLWK6WHS
Ŷ,ILWLVQRWQHFHVVDU\WRUHPRYHGRRUVVNLSWR6WHS
11. Leave tape and all packaging on doors until the
refrigerator is in the final location.
Ŷ
NOTE:
8VHDSDGGHGKDQGWUXFNWRPRYHWKLV
refrigerator. Place the refrigerator on the hand
truck with a side against the truck. We strongly
recommend that TWO PEOPLE move and complete
this installation.
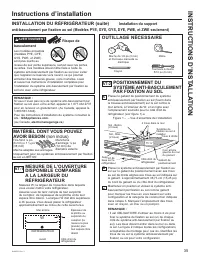
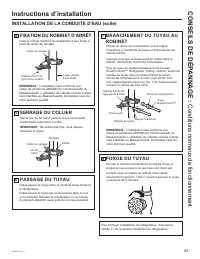
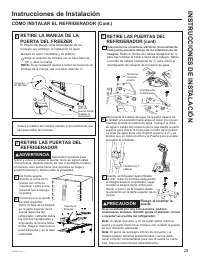
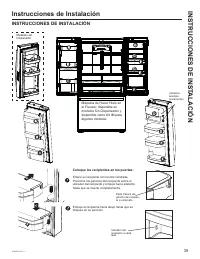
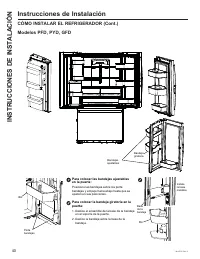
REMOVE THE FRESH FOOD
DOOR HANDLE
+DQGOH'HVLJQYDULHVEDVHGRQPRGHOVKRZHYHU
,QVWDOODWLRQLVVDPH
Stainless steel and plastic handles:
/RRVHQWKHVHWVFUHZVZLWKWKH´$OOHQ
wrench and remove the handle.
NOTE:
,IWKHKDQGOHPRXQWLQJIDVWHQHUVQHHG
WREHWLJKWHQHGRUUHPRYHGXVHD´
Allen
wrench.
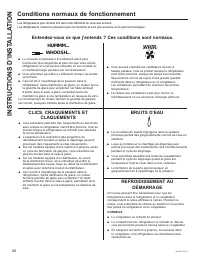
FOR DOOR IN DOOR MODELS
ONLY
To Remove the Handle:
Ŷ2SHQWKHRXWHUGRRUE\SUHVVLQJWKH'RRULQ
'RRUODWFK
Ŷ
Loosen the set screws as shown in Step 1.
To Install the Handle:
Ŷ
Align the lever with the opening on the outer
door. Make sure the hook is pointed up.
Ŷ,QVHUWWKHODWFKOHYHULQWRWKHRSHQLQJDQG
align the handle with the mounting fasteners.
Ŷ
Once the handle is flush with the outer door,
tighten the set screws.
'RQRWUHPRYHWDSHIURPGRRUXQWLOKDQGOHLV
installed
1
1a
Mounting
)DVWHQHUV
Leave film
on until after
installation
INST
ALLA
TION INSTRUCTIONS
'RRULQGRRU
Latch
Latch Lever
with Hook
facing up.
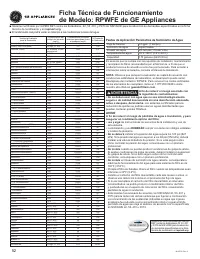
"Cargando la instrucción" significa que debes esperar hasta que el archivo se cargue y puedas leerlo en línea. Algunas instrucciones son muy grandes y el tiempo de carga depende de la velocidad de tu conexión a Internet.
Otros modelos de frigoríficos GE
-
 GE GFD28GELDS
-
 GE GFD28GYNFS
-
 GE GFE28GELDS
-
 GE GFE28GYNFS
-
 GE GIE17GSNRSS
-
 GE GIE18DTNRBB
-
GE GIE18DTNRWW
-
 GE GIE18GCNRSA
-
GE GIE18GSNRSS
-
GE GIE18GTNRBB