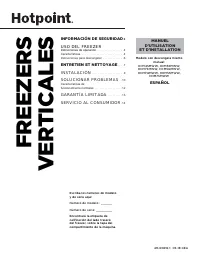
Hotpoint HHM5SMWW - Manual de uso - Página 2


49-60816-1
INST
ALLA
TION
Preparing of Installation
Read these instructions completely and carefully.
Freezer Location
<RXUIUHH]HUVKRXOGEHFRQYHQLHQWO\ORFDWHGIRU
day-to-day use in a dry, well-ventilated room.
'RQRWLQVWDOOWKHIUHH]HUZKHUHWKHWHPSHUDWXUHZLOOJR
EHORZ)&RUDERYH)&EHFDXVHLWZLOO
not maintain proper temperatures.
'RQRWLQVWDOOWKHIUHH]HULQDORFDWLRQH[SRVHGWRUDLQ
water or direct sunlight.
Be sure to install your freezer on a floor strong enough
to support it when it is fully loaded.
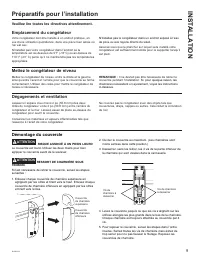
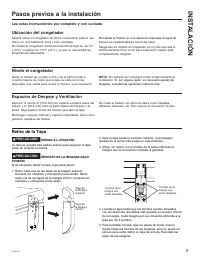
Level Freezer
Level the freezer from side to side and front to back
VRWKDWWKHOLGZLOOVHDOSURSHUO\8VHVKLPVWROHYHOWKH
freezer if necessary.
NOTE:
It should not be necessary to remove the lid
during installation. If, for some reason, the hinges need
adjustment, see instructions below.
Clearances and Ventilation
$OORZDWOHDVW´PPFOHDUDQFHRQERWKVLGHVRI
WKHIUHH]HUDQG´PPEHWZHHQWKHEDFNRIWKH
freezer and the wall. Leave room above the freezer to
open the lid.
.HHSIODPPDEOHPDWHULDOVDQGYDSRUVVXFKDVJDVROLQH
away from freezer.
'RQRWFRYHUWKHIUHH]HUZLWKLWHPVVXFKDVEODQNHWV
sheets, tablecloths, etc. This reduces air circulation.
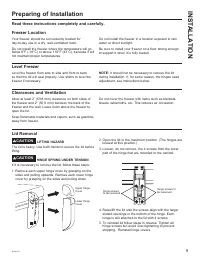
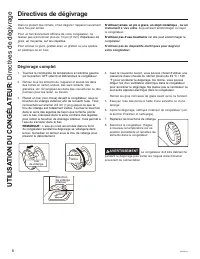
Lid Removal
CAUTION
LIFTING HAZARD
7KHOLGLVKHDY\8VHERWKKDQGVWRVHFXUHWKHOLGEHIRUH
lifting.
CAUTION
HINGE SPRING UNDER TENSION
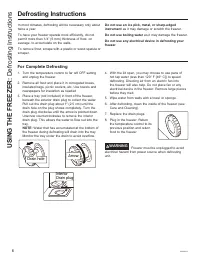
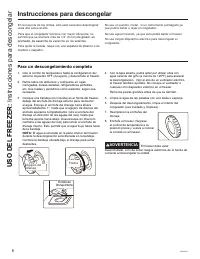
If it is necessary to remove the lid, follow these steps:
1. Remove each upper hinge cover by grasping on the
sides and pulling upwards. Remove each lower hinge
cover by grasping on the sides and pulling down.
2. Open the lid to the maximum position. (The hinges are
loosest at this position.)
3. Loosen, do not remove, the 4 screws from the lower
part of the hinge that are mounted to the cabinet.
4. Raise/lift the lid until the screws align with the larger
slotted openings in the bottom of the hinge. Each
hinge is still attached to the lid with 4 screws.
5. To reinstall lid follow steps in reverse. Tighten all
hinge screws but avoid over-tightening to prevent
stripping. Reinstall hinge covers.
8SSHU+LQJH
Cover
Lower Hinge
Cover
Hinge screws to
be loosened
Hinge screws
to be loosened
"Cargando la instrucción" significa que debes esperar hasta que el archivo se cargue y puedas leerlo en línea. Algunas instrucciones son muy grandes y el tiempo de carga depende de la velocidad de tu conexión a Internet.
Otros modelos de congeladores Hotpoint
-
 Hotpoint HCM7SMWW
-
 Hotpoint HCM9CTCD
-
 Hotpoint HCM9DMWW
-
 Hotpoint HCM9STWW
-
 Hotpoint HHM5SRWW
-
 Hotpoint HHM7SMWW
-
 Hotpoint HHM7SRWW