Legrand NOCSUS - Manual de uso - Página 37


Índice:
- Página 4 – Schlitzschraubendreher.; Benodigd gereedschap
- Página 6 – Guided installation video available at:; Pour un fonctionnement optimal,
- Página 10 – Schalten Sie den Strom der Sicherung oder Schutzschalter ab,
- Página 12 – Prepare the installation.; Bereiten Sie die Installation vor.
- Página 14 – tion box. Make sure that the UP sign is at; Sécurisez la plaque de fixation à la boîte de jonction.; Secure the mounting strap
- Página 18 – Hang the camera with the wire tie.; Carefully hang the camera with the wire tie from; Suspendez la caméra à l'aide de la sangle.
- Página 24 – Secure the camera; Use the provided mounting holder and black; Fijar la cámara a la placa.
- Página 33 – 下載應用。; 下载应用。
- Página 34 – Apple homeKit; Your Camera is compatible with Apple HomeKit.
38
QR-card-V5
Security code for product setup.
Keep card in a safe place.
Do not throw away.
To perform a factory reset, show this red QR
code to the camera.
The floodlight will make five fast blinks twice
to confirm the operation.
All the data and configuration will be lost.
During the product setup, show this black QR
code to the camera only when required by
the App. Until the floodlight starts to blink.
30cm
1 ft.
IT
Scheda di configurazione
Questa scheda contiene alcuni codici di configurazione
unici. Saranno necessari per riconfigurare la Videocamera.
Conservare la scheda in un luogo sicuro. Non gettarla via.
A.
CONFIGURAZIONE con Codice QR (nero): durante la configurazione
del prodotto o del Wi-Fi, inquadrare il codice QR nero con la
videocamera solo quando richiesto dall'App. Fino a quando la luce
inizia a lampeggiare.
B.
RIPRISTINO con codice QR (rosso): per ripristinare le impostazioni
di fabbrica, inquadrare il codice QR rosso con la videocamera. La
luce emetterà cinque lampeggi veloci per due volte per confermare
l'operazione. Tutti i dati e le impostazioni saranno cancellati.
Quando si inquadra il codice QR con la Videocamera, tenerlo
a una distanza di 30 cm. Assicurarsi che ci sia abbastanza
luce ambiente affinché la videocamera legga il codice.
Potrebbe non funzionare di notte.
30cm
1 ft.
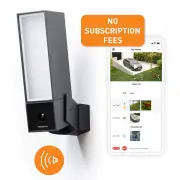
Smart Outdoor Camera
"Cargando la instrucción" significa que debes esperar hasta que el archivo se cargue y puedas leerlo en línea. Algunas instrucciones son muy grandes y el tiempo de carga depende de la velocidad de tu conexión a Internet.
Resumen
4 NL IT ES DE FR EN Required Tools (not included): - Phillips and slotted screwdrivers. - Step ladder. - Drill - Ø6mm (only required if there is no junction box where the product is installed). - Caulking gun and Silicone sealant (recommended tool). - Level (recommended tool). Herramientas neces...
6 For optimal performance install the Smart Outdoor Camera at a height between 2.5 and 4 meters (8 and 14 ft.) with a tilt angle of around 30°. Guided installation video available at: https://www.netatmo.com/outdoor-cam-setup Read carefully the safety information on page 48 before proceeding to the ...
10 Caution: electrical danger. Disconnect power at fuse or circuit breaker before proceeding to the installation. ES DE Vorsicht: elektrische Gefahr. Schalten Sie den Strom der Sicherung oder Schutzschalter ab, bevor Sie mit der Installation beginnen. Avertissement : danger électrique. Coupez le cou...