Midea MLE25H7BWW - Manual de uso - Página 2


14
Dry
er
Saf
ety
Oper
ation
R
equir
ements
P
arts and
Fea
tur
es
Ins
talla
tion
Ins
tructions
Dry
er Use
Dry
er Car
e
Tr
ouble
-
shooting
Appendix
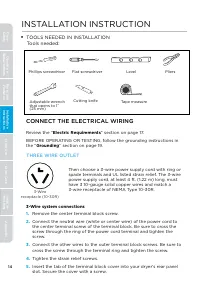
Phillips screwdriver
Adjustable wrench
that opens to 1”
(25 mm)
Flat screwdriver
Cutting knife
Tape measure
Pliers
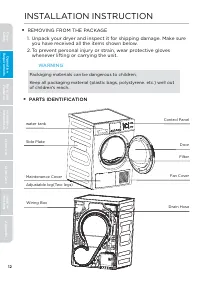
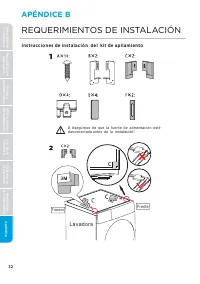
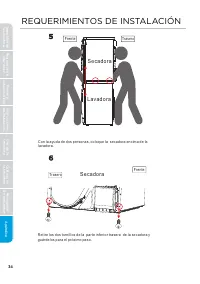
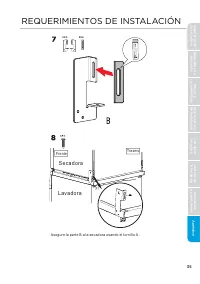
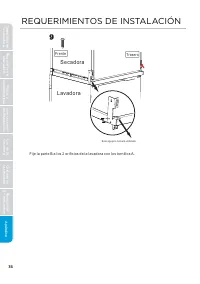
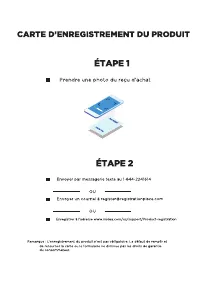
INSTALLATION INSTRUCTION
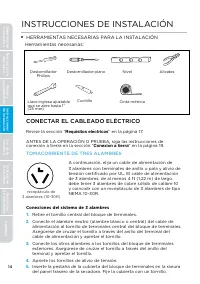
TOOLS NEEDED IN INSTALLATION
Tools needed:
CONNECT THE ELECTRICAL WIRING
Review the “
Electric Requirements
” section on page 17.
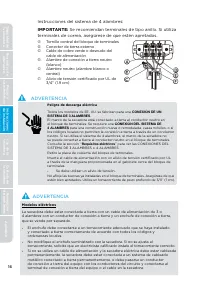
BEFORE OPERATING OR TESTING, follow the grounding instructions in
the “
Grounding
” section on page 19.
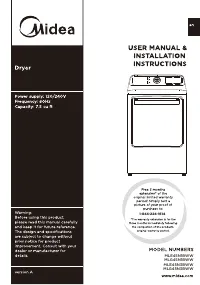
Then choose a 3-wire power supply cord with ring or
spade terminals and UL listed strain relief. The 3-wire
power supply cord, at least 4 ft. (1.22 m) long, must
have 3 10-gauge solid copper wires and match a
3-wire receptacle of NEMA Type 10-30R.
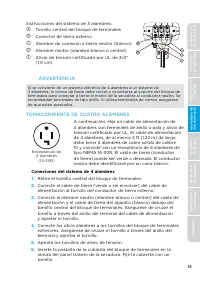
3-Wire system connections
1.
Remove the center terminal block screw.
2.
Connect the neutral wire (white or center wire) of the power cord to
the center terminal screw of the terminal block. Be sure to cross the
screw through the ring of the power cord terminal and tighten the
screw.
3.
Connect the other wires to the outer terminal block screws. Be sure to
cross the screw through the terminal ring and tighten the screw.
4.
Tighten the strain relief screws.
5.
Insert the tab of the terminal block cover into your dryer’s rear panel
slot. Secure the cover with a screw.
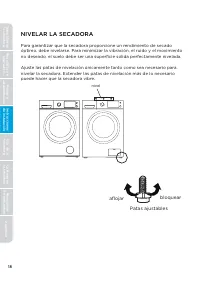
Level
THREE WIRE OUTLET
3-Wire
receptacle (10-30R)
"Cargando la instrucción" significa que debes esperar hasta que el archivo se cargue y puedas leerlo en línea. Algunas instrucciones son muy grandes y el tiempo de carga depende de la velocidad de tu conexión a Internet.
Otros modelos de secadoras Midea
-
 Midea MLE45N3BWW
-
 Midea MLG45N3BWW