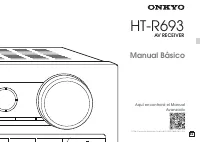
Onkyo HT-S7705B - Manual de uso - Página 11


Índice:
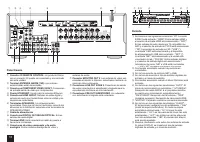
- Página 34 – Conexiones; Conexión de la TV y de los reproductores; Importante; Conexión de cable HDMI
- Página 36 – Conexión de altavoces; Instrucciones sobre cómo conectar altavoces
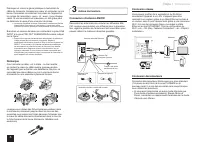
- Página 37 – Nota; Conexión de auriculares
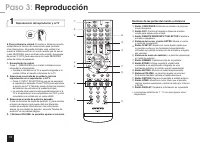
- Página 41 – Reproducción; Reproducción del reproductor y la TV
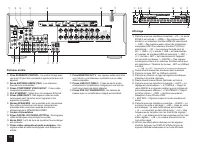
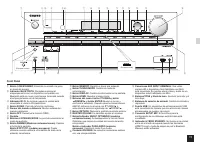
- Página 47 – Panel trasero; Pantalla
- Página 50 – DESCARGO DE RESPONSABILIDAD
- Página 51 – Declaración de Conformidad; The Americas
17
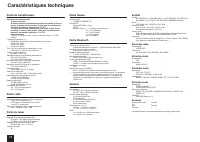
Troubleshooting
Before starting the procedure
Problems may be solved by simply turning the power
on/off or disconnecting/connecting the power cord,
which is easier than working on the connection,
setting and operating procedure. Try the simple
measures on both the unit and the connected
device. If the problem is that the video or audio is not
output or the HDMI linked operation does not work,
disconnecting/connecting the HDMI cable may solve
it. When reconnecting, be careful not to wind the
HDMI cable since if wound the HDMI cable may not fit
well. After reconnecting, turn off and on the unit and
the connected device.
The AV receiver turns off unexpectedly.
r
The AV receiver will automatically enter standby mode
when Auto Standby is set and launched.
There’s no sound, or it’s very quiet.
r
A wrong input selector button has been selected. Select
a correct input for the player. Also check that MUTING on
the remote controller is not pressed.
r
Not all listening modes use all speakers.
There’s no picture.
r
A wrong input selector button has been selected.
r
Video is not displayed if the listening mode is Pure Audio.
(European model)
r
To display video from the connected player on the TV
screen while the unit is in standby, you need to enable
HDMI Through function.
r
When the TV image is blurry or unclear, power code or
connection cables of the unit may have interfered. In
that case, keep distance between TV antenna cable and
cables of the unit.
r
If you connect a player supporting HDCP2.2, be sure to
connect it to the HDMI IN3 jack of the unit. At the time,
connect the TV to the HDMI OUT MAIN jack.
HDMI control does not function correctly.
r
Set the CEC link function of the unit to on. It is also
necessary to make the HDMI linked system setting on
the TV. See the TV's instruction manual for details.
The remote controller does not work.
r
Be sure to press RCV first before operating the unit with
the remote controller.
There is no sound when multi-zone function is
used.
r
With multi-zone function, sound is output only when the
signal input source is an external component connected
to the analog audio input jacks of the unit, "NET", "USB"
or "BLUETOOTH". Multi-zone playback is not possible
if the player and the unit are connected via HDMI cable
or digital cable. Connect the RCA audio output jacks of
the player and the analog audio input jacks of the unit
with RCA cable. Also, some players require analog audio
output setting.
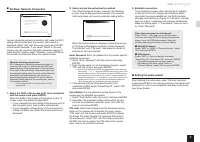
Cannot access to network.
r
Try plugging/unplugging the unit or the wireless LAN
router or check their power-on status. This will work well
in many cases.
r
If the desired wireless LAN router is not in the access
point list, it may be set to hide SSID or the ANY
connection may be off. Change the setting and try again.
Bluetooth
r
Try plugging/unplugging the unit and the
Bluetooth-enabled player. After that, check that the
Bluetooth function is enabled on the Bluetooth-enabled
device and the connection with the unit has been
established.
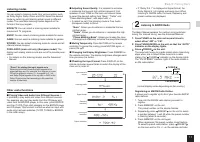
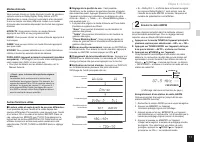
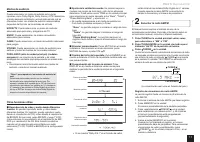
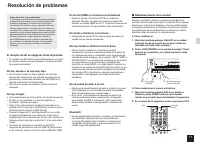
Resetting the unit
Resetting the unit to the status at the time of shipment may
solve the problem. If the measures above do not solve the
problem, reset the unit with the following procedure. If you
reset the unit status, your preferences will be reset to the
defaults. Note them down before starting reset.
z
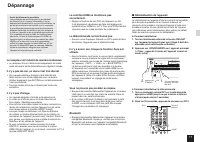
How to reset
:
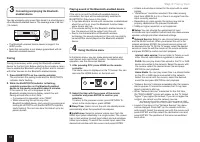
1.
While holding down CBL/SAT on the main unit (note
that step 2 must be performed with this button
pressed down)
2.
Press
z
ON/STANDBY on the main unit ("Clear"
appears on the display and the unit returns to
standby)
C l e ar
1.
While holding
down CBL/SAT,
2.
Press
z
ON/
STANDBY.
z
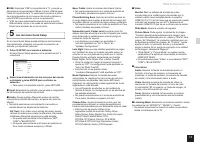
How to reset the remote controller
:
1.
While holding down RCV on the remote controller,
press HOME until the remote indicator lights (about
3 seconds)
2.
Within 30 seconds, press RCV again.
RCV
Remote
indicator
HOME
"Cargando la instrucción" significa que debes esperar hasta que el archivo se cargue y puedas leerlo en línea. Algunas instrucciones son muy grandes y el tiempo de carga depende de la velocidad de tu conexión a Internet.
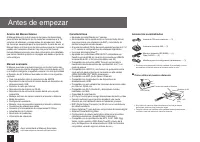
Resumen
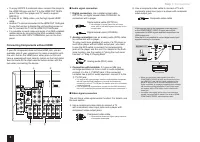
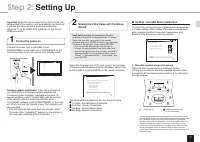
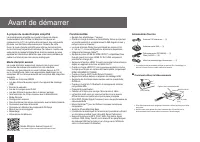
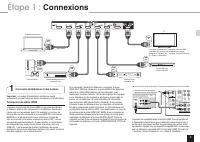
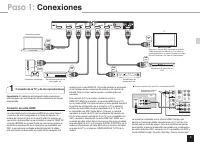
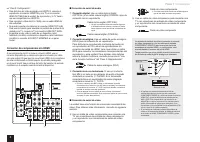
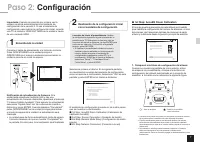
Paso 1: Conexiones 3 1 Conexión de la TV y de los reproductores Importante : El cable de alimentación debe conectarse sólo después de que todas las otras conexiones se hayan completado. Conexión de cable HDMI La unidad tiene muchos conectores HDMI en su panel trasero y cada uno de ellos corresponde ...
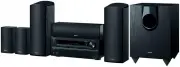
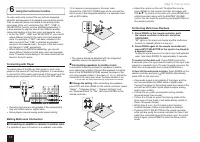
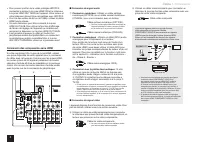
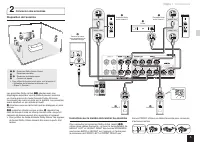
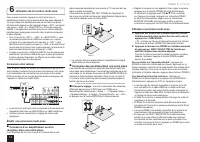
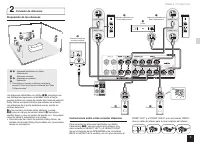
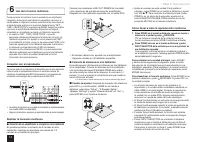
5 Paso 1: Conexiones 2 Conexión de altavoces Disposición de los altavoces # $ % & ' " " # Altavoces habilitados con Dolby (Delanteros) $ Altavoces centrales % & Altavoces envolventes ' Subwoofer r Para utilizar la función multizona, consulte la sección 6 “Uso de la función multizona”...
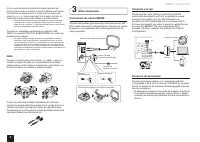
6 Paso 1: Conexiones Corte y quita la cubierta de plástico del extremo del cable del altavoz, gire el núcleo y conéctelo al terminal. Realice una conexión correcta entre las conexiones de la unidad y las conexiones del altavoz (+ a + y - a -) para cada canal. Si la conexión está mal, un sonido bajo ...