Utilitech UT70C - Manual de uso - Página 9

Lowes.com
24
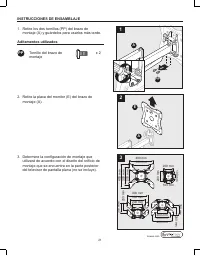
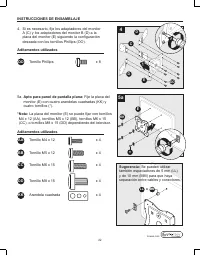
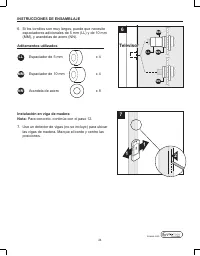
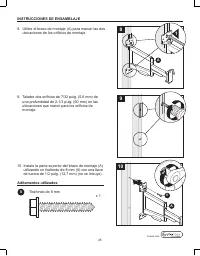
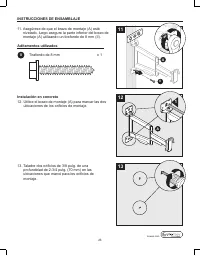
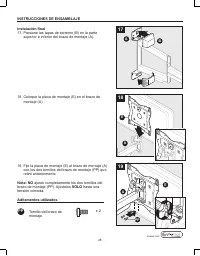
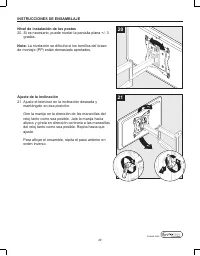
INSTRUCCIONES DE ENSAMBLAJE
6. Si los tornillos son muy largos, puede que necesite
espaciadores adicionales de 5 mm (LL) y de 10 mm
(MM), y arandelas de acero (NN).
Instalación en viga de madera
Nota:
Para concreto, continúe con el paso 12.
7. Use un detector de vigas (no se incluye) para ubicar
las vigas de madera. Marque el borde y centre las
posiciones.
Televisor
Televisor
6
MM
NN
LL
NN
1
1
2
7
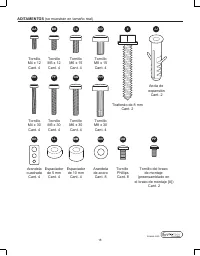
Aditamentos utilizados
LL
MM
NN
x 4
x 4
x 8
Espaciador de 5 mm
Espaciador de 10 mm
Arandela de acero
M4 x 12 Screw Qty. 4
AA
M5 x 12 Screw Qty. 4
BB
M6 x 15 Screw Qty. 4
CC
M8 x 15 Screw Qty. 4
8 mm Lag bolt
Qty. 2
Anchor Qty. 2
DD
M4 x 30 Screw Qty. 4
EE
M5 x 30 Screw Qty. 4
FF
M6 x 30 Screw Qty. 4
GG
M8 x 30 Screw Qty. 4
HH
Square washer Qty. 4
KK
5 mm Spacer Qty. 4
Phillips screw Qty. 8
Mounting arm screw (preassembled to Mounting arm (A))
Qty. 2
LL
OO
PP
10 mm Spacer Qty. 4
MM
Steel washer Qty. 8
NN
II
JJ
"Cargando la instrucción" significa que debes esperar hasta que el archivo se cargue y puedas leerlo en línea. Algunas instrucciones son muy grandes y el tiempo de carga depende de la velocidad de tu conexión a Internet.