Gaggenau WS 461-100 Calentador – Manual de instrucciones en formato pdf, léalo en línea gratis. Esperamos que le ayude a resolver cualquier duda que pueda tener al utilizar el aparato.
Si aún tiene preguntas, escríbalas debajo del manual de instrucciones.
"Estamos cargando el manual" significa que debe esperar a que se cargue el archivo para poder leerlo en línea. Algunos manuales son muy pesados y el tiempo que tardan en aparecer depende de su velocidad de internet.

de
Ø
Montageanleitung
Das müssen Sie beachten
Elektrischer Anschluss
Das Gerät darf nur an eine vorschriftsmäßig installierte Schutz-
kontakt-Steckdose angeschlossen werden. Das Verlegen einer
Steckdose oder Austausch der Anschlussleitung darf nur vom
Elektrofachmann unter Berücksichtigung der einschlägigen Vor-
schriften ausgeführt werden.
Das Gerät darf nur mit der mitgelieferten Anschlussleitung
angeschlossen werden. Stecken Sie die Anschlussleitung an
der Geräterückseite an.
Anschlussleitungen mit verschiedenen Steckertypen sind beim
Kundendienst erhältlich.
Keine Mehrfachstecker, Steckerleisten und Verlängerungen
benutzen. Bei Überlastung besteht Brandgefahr.
Wenn der Stecker nach dem Einbau nicht mehr erreichbar ist
muss installationsseitig eine allpolige Trennvorrichtung mit
einem Kontaktabstand von mind. 3 mm vorhanden sein.
Einbaumöbel
Der Einbauschrank darf hinter den Geräten keine Rückwand
haben. Zwischen Wand und Schrankboden bzw. Rückwand des
darüberliegenden Schrankes muss ein Abstand von mind.
45 mm eingehalten werden.
Die Lüftungsschlitze und Ansaugöffnungen dürfen nicht verdeckt
werden.
Hierzu auch die Montageanleitung des darüberliegenden Gerä-
tes beachten.
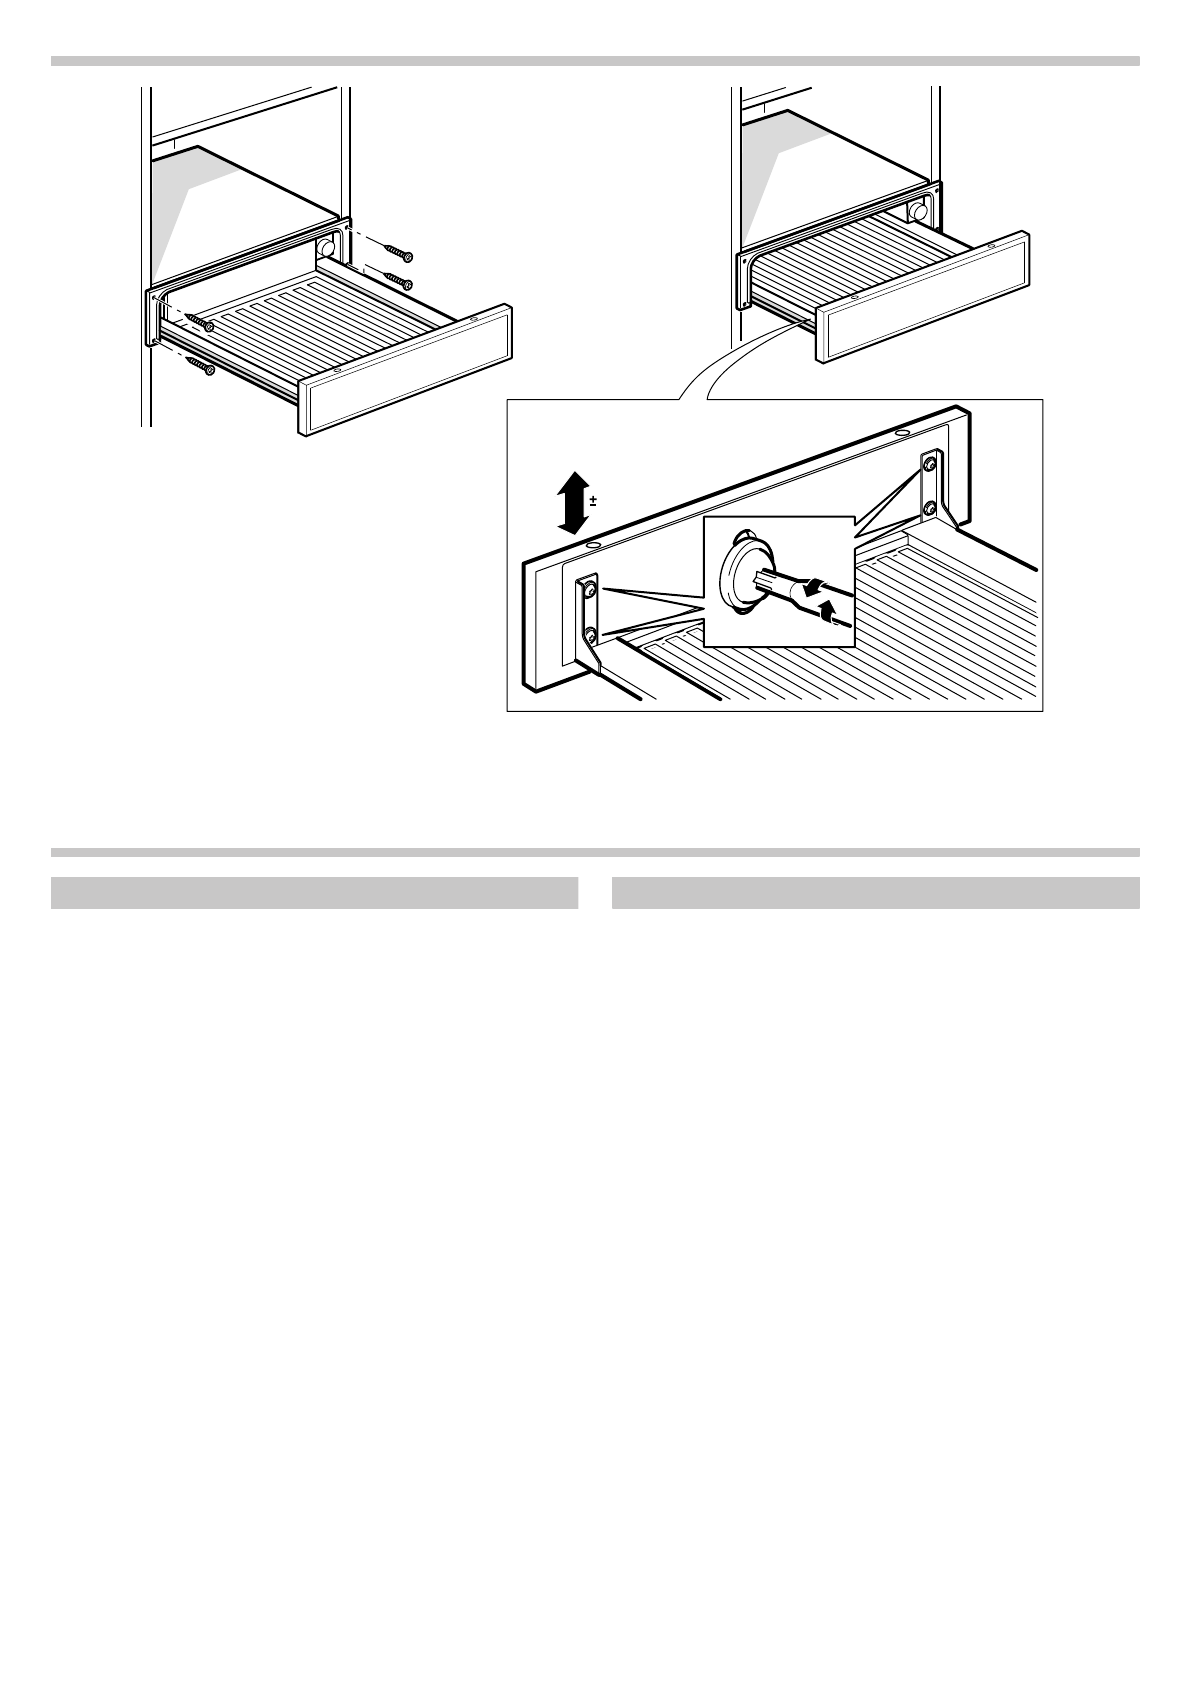
Einsetzen des Gerätes
Schließen Sie das Gerät an. Gerät bündig im Möbel ausrichten
und festschrauben.
Hinweis:
Achten Sie darauf, dass die Anschlussleitung nicht ein-
geklemmt oder geknickt wird.
Die Anschlussleitung darf nach dem Einbau die Rückseite und
den Boden des Gerätes nicht berühren.
en
Ú
Installation instructions
Please observe
Electrical connection
The appliance must only be connected to a properly installed
protective contact socket. The installation of the socket or
replacement of the connecting cable must only be carried out
by a qualified electrician in accordance with current regulations.
The appliance must only be connected with the power cable
provided. Connect the power cable to the back of the appliance.
Power cables with various plug types are available from our
after-sales service.
Do not use multi-plug adapters, power strips or extension leads.
There is a risk of fire in the event of overloading.
If the plug is no longer accessible subsequent to installation, an
all-pole disconnecting device must be present on the installation
side with a contact gap of at least 3 mm.
Fitted units
There must be no rear wall to fitted units which house
appliances. There must be a gap of at least 45 mm between the
wall and the base of the unit, as well as between the wall and
the rear wall of theunit above.
The ventilation slots and air intake points must not be covered.
To ensure that they remain uncovered, also observe the
installation instructions for the appliance above.
Installing the appliance
Connect the appliance to the mains. Then align the appliance
flush with the units and screw it in place.
Note:
Ensure that the connector lead does not become trapped
or bent. After installation, the connector lead must not be in
contact with the back or the base of the appliance.
After installation, the connector lead must not be in contact with
the back or the base of the appliance.
PP
¿Tiene más preguntas?¿No ha encontrado la solución a su problema en el manual o tiene otros problemas? Haga su pregunta en el siguiente formulario con una descripción detallada de su situación para que otras personas y expertos puedan responderla. Si sabe cómo resolver el problema de otra persona, ayúdele :)


