Campbell Hausfeld DC080500 - Manual de uso - Página 4


MAINTENANCE
/
REP
AIR
TROUBLESHOOTING
OPERA
TION
ASSEMBL
Y /
INST
ALLA
TION
SAFETY /
SPECIFICA
TIONS
GETTING
ST
AR
TED
6
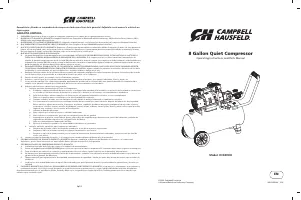
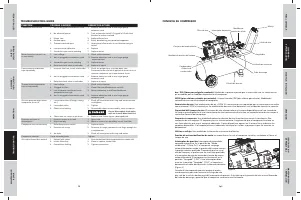
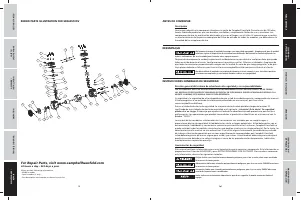
GETTING TO KNOW YOUR COMPRESSOR (CONTINUED)
Regulator -
The regulator controls the amount of air pressure at the hose outlet. Turning regulator knob
clockwise (to the right) will increase air pressure at the outlet. Turning knob counterclockwise (to the
left) will lower air pressure to the outlet. Turning knob fully counterclockwise will shut off flow of air
completely.
Handle
- Designed to move the compressor.
ASME Safety Valve -
This valve automatically releases air if the tank pressure exceeds the preset
maximum.
Exhaust Tube
- This tube carries compressed air from the pump to the check valve. This tube becomes very
hot during use. To avoid the risk of severe burns, never touch the exhaust tube.
Check Valve -
One-way valve that allows air to enter the tank, but prevents air in the tank from flowing
back into the compressor pump.
Air Outlet
- A
quick connect coupler designed to work in combination with a quick connect plug to quickly
and easily join the compressor to an air hose.
Pressure Gauges
- These gauges will show air pressure in the compressor tank and at the compressor
outlet.
Outlet Pressure Gauge
- Will show air pressure at the outlet in pounds per square inch (psi). Make sure
this gauge reads ZERO (by adjusting regulator knob fully counterclockwise) before changing air tools or
disconnecting air hose from outlet.
Tank Pressure Gauge
- Will show air pressure in tank while the compressor is running, indicating
compressor is building pressure properly. This gauge will show maximum pressure of compressor when it
shuts off automatically at the pressure switch.
Drain Valve
- This valve is located underneath the tank. Use this valve to drain moisture from the tank daily
to reduce the risk of corrosion.
Drain liquid from tank daily.
Reduce tank pressure below 10 psi, then drain moisture from tank daily to avoid tank corrosion. Drain
moisture from tank by opening the drain valve located underneath the tank.
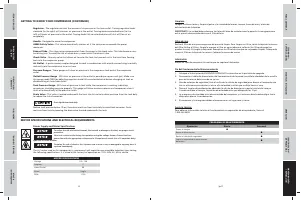
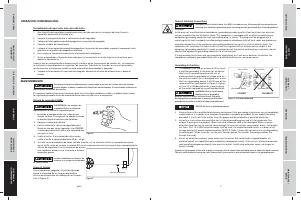
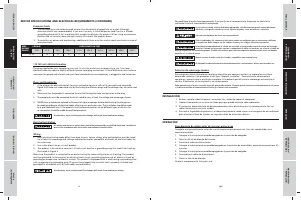
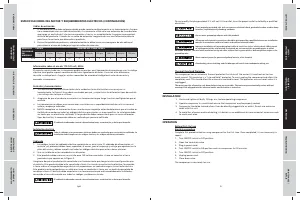
MOTOR SPECIFICATIONS AND ELECTRICAL REQUIREMENTS
Power Supply and Motor Specifications
To reduce the risk of electrical hazards, fire hazards or damage to the tool, use proper circuit
protection.
Your tool is wired at the factory for operation using the voltage shown. Connect tool to a
power line with the appropriate voltage and a 15-amp branch circuit. Use a 15-amp time delay
type fuse or circuit breaker.
To reduce the risk of shock or fire, if power cord is worn or cut, or damaged in any way, have it
replaced
immediately.
The A-C motor used on this compressor is a permanent split capacitor non-reversible induction type, having
the following specifications. It is wired at the factory for operation on 110V-120V AC, 60 Hz service.
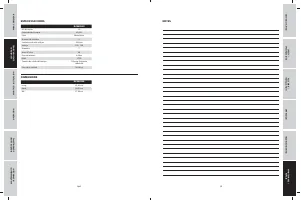
MOTOR SPECIFICATIONS
Voltage
110 - 120
Amperes
7
Hertz (Cycles)
60
Phase
Single
RPM
1750
MANTENIMIENTO
/ REP
ARACION
IDENTIFICACION
DE PROBLEMAS
OPERACION
MONT
AJE / INST
ALACION
SEGURIDAD /
ESPECIFICACIONES
P
ARA
COMENZAR
Sp11
Limpieza
Apague la alimentación y limpie el polvo y la suciedad del motor, tanque, líneas de aire y aletas de
enfriamiento de la bomba.
IMPORTANTE:
La unidad debe colocarse tan lejos del área de rociado como lo permita la manguera para
evitar que el sobrerociado obstruya el filtro de aire.
Filtro de aire
Revise el filtro de aire para asegurarse de que esté limpio. Para limpiar un filtro, retire la tapa de la carcasa
del filtro. Retire el filtro y limpie la espuma o filtro en agua jabonosa, caliente (los filtros de papel no
pueden lavarse). Enjuague y deje secar. Reemplace los filtros de aire que no se pueden limpiar. Coloque de
nuevo el filtro en la base de la carcasa. Coloque la carcasa de nuevo.
Lubricación
Este es un tipo de compresor sin aceite que no requiere lubricación.
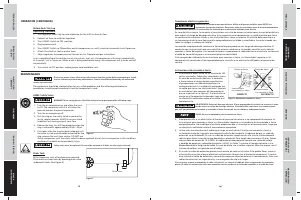
Fin del funcionamiento/almacenamiento
1. Coloque el interruptor de ENCENDIDO/APAGADO automático en la posición de apagado.
2. Desconecte el cable de alimentación del tomacorriente de la pared y enróllelo alrededor de la manilla
para evitar que se dañe cuando no se use.
3. Usando anteojos de seguridad, hale el anillo de la válvula de seguridad para drenar el tanque de aire.
Use su otra mano para desviar el aire a alta velocidad y evitar que se dirija hacia su cara.
4. Drene el tanque de condensación abriendo la válvula de drenaje en la parte inferior del tanque.
Cuando se drena el tanque, la presión de este debe estar por debajo de los 10 psi.
5. La manguera de aire debe estar desconectada del compresor y el extremo abierto debe colgar hacia
abajo para drenar la condensación.
6. El compresor y la manguera deben almacenarse en un lugar seco y fresco.
Servicio técnico
Para obtener información relativa al funcionamiento o reparación de este producto, llame al
1-800-543-6400.
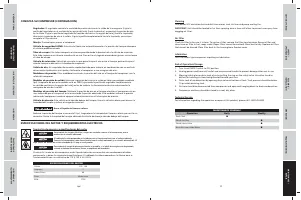
PROGRAMA DE MANTENIMIENTO
Operación
Diaria
Semanal
Drene el tanque
●
Revise el filtro de aire
●
Revise la válvula de seguridad
●
Sople la suciedad de la parte interna
del motor
●
"Cargando la instrucción" significa que debes esperar hasta que el archivo se cargue y puedas leerlo en línea. Algunas instrucciones son muy grandes y el tiempo de carga depende de la velocidad de tu conexión a Internet.
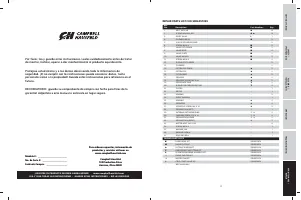
Otros modelos de compresores Campbell Hausfeld
-
 Campbell Hausfeld DC010500
-
 Campbell Hausfeld DC060500
-
 Campbell Hausfeld HS5180
-
 Campbell Hausfeld TF2136
-
 Campbell Hausfeld XC302100
-
 Campbell Hausfeld XC602100
-
 Campbell Hausfeld XC802100