GE PVS06BSPSS - Manual de uso - Página 4
49-1000514 Rev. 1
13
Installation Instructions
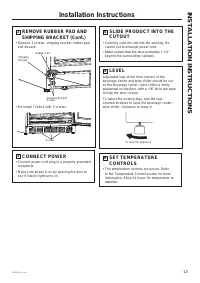
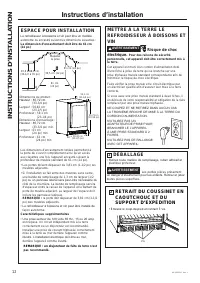
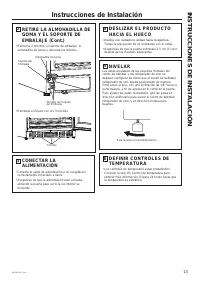
5
LEVEL
Adjustable legs at the front corners of the
beverage center and wine chiller should be set
so the beverage center / wine chiller is firmly
SRVLWLRQHGRQWKHIORRUZLWKD´WLOWWRWKHEDFN
to help the door closure.
To adjust the leveling legs, turn the legs
counterclockwise to raise the beverage center /
wine chiller, clockwise to lower it.
6
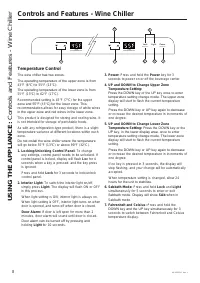
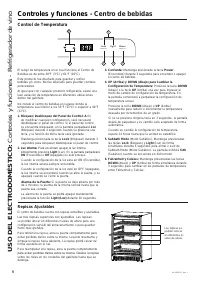
SET TEMPERATURE
CONTROLS
• The temperature controls are preset. Refer
to the Temperature Control section for more
information. Allow 24 hours for temperature to
VWDELOL]H
4
SLIDE PRODUCT INTO THE
CUTOUT
• Carefully slide the unit into the opening. Be
careful not to entangle power cord.
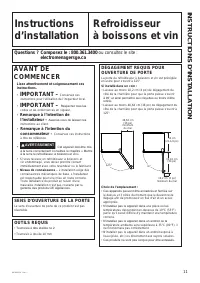
0DNHFHUWDLQWKDWWKHGRRUSURWUXGHV´
beyond the surrounding cabinets.
To raise the appliance
INSTALLATION INSTRUCTIONS
3
CONNECT POWER
• Connect power cord plug to a properly grounded
receptacle.
• Make sure power is on by opening the door to
see if interior light turns on.
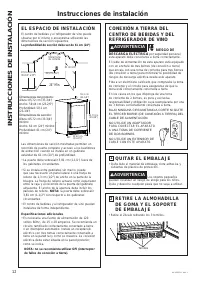
2
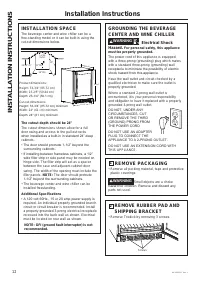
REMOVE RUBBER PAD AND
SHIPPING BRACKET (Cont.)
• Remove 2 screws, shipping bracket, rubber pad
and discard.
• Re-install Toekick with 3 screws.
Rubber Pad
Shipping Bracket
Screws
Shipping
Bracket
Screws
"Cargando la instrucción" significa que debes esperar hasta que el archivo se cargue y puedas leerlo en línea. Algunas instrucciones son muy grandes y el tiempo de carga depende de la velocidad de tu conexión a Internet.
Otros modelos de frigoríficos GE
-
 GE GFD28GELDS
-
 GE GFD28GYNFS
-
 GE GFE28GELDS
-
 GE GFE28GYNFS
-
 GE GIE17GSNRSS
-
 GE GIE18DTNRBB
-
GE GIE18DTNRWW
-
 GE GIE18GCNRSA
-
GE GIE18GSNRSS
-
GE GIE18GTNRBB