Makita DT04R1 - Manual de uso - Página 13


Índice:
- Página 2 – ESPECIFICACIONES; ADVERTENCIAS DE; Advertencias generales de; Conserve todas las advertencias
- Página 4 – GUARDE ESTAS INSTRUCCIONES.; GUARDE ESTAS
- Página 5 – Instalación o extracción del; Sistema de protección de batería
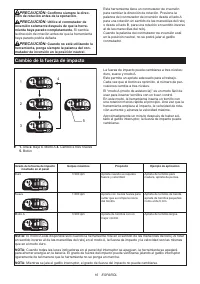
- Página 7 – Cambio de la fuerza de impacto
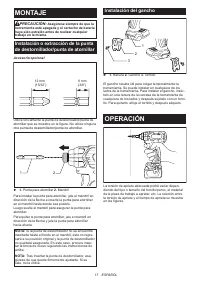
- Página 8 – MONTAJE; Instalación o extracción de la punta; Instalación del gancho; OPERACIÓN
- Página 9 – Uso de la funda
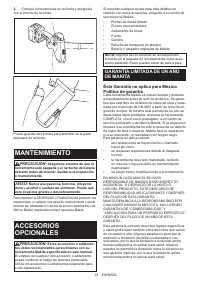
- Página 10 – GARANTÍA LIMITADA DE UN AÑO; Ésta Garantía no aplica para México
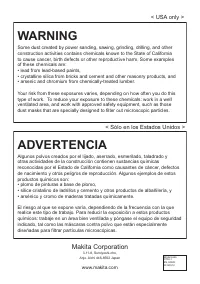
- Página 11 – WARNING; productos químicos son:; Makita Corporation
- Página 14 – ESPAÑOL; INSTRUCCIONES DE SEGURIDAD IMPORTANTES
5
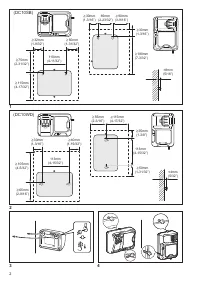
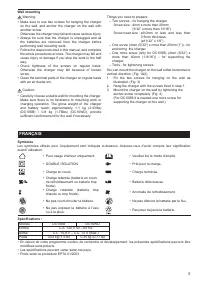
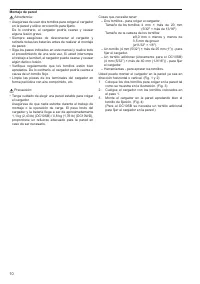
Wall mounting
Warning:
• Make sure to use two screws for hanging the charger
on the wall, and anchor the charger on the wall with
another screw.
Otherwise the charger may fall and cause serious injury.
• Always be sure that the charger is unplugged and all
the batteries are removed from the charger before
performing wall mounting work.
• Follow the steps instructed in this manual, and complete
the whole procedures at once. The charger may fall and
cause injury or damage if you stop the work in the half
way.
• Check tightness of the screws on regular basis.
Otherwise the charger may fall because of loosen
screw.
• Clean the terminal parts of the charger on regular basis
with an air duster etc.
Caution:
• Carefully choose a stable wall for mounting the charger.
Make sure there is no hindrance to mounting work or
charging operation. The gross weight of the charger
and battery reach approximately 1.1 kg (2.43lbs)
(DC10SB) / 0.8 kg (1.76lbs) (DC10WD), provide
sufficient reinforcement for the wall if necessary.
Things you need to prepare:
– Two screws - for hanging the charger.
Screw size : 4mm x more than 20mm
(5/32” x more than 13/16”).
Screw head size : ø9.0mm or less and less than
3.5mm thickness.
(ø11/32” x 1/8”).
– One screw (4mm (5/32”) x more than 25mm (1”)) - for
anchoring the charger.
– One more screw (only for DC10SB) (4mm (5/32”) x
more than 40mm (1-9/16”)) - for supporting the
charger.
– Tools - for tightening screws.
You can mount the charger on the wall either horizontal or
vertical direction. (Fig. 1&2)
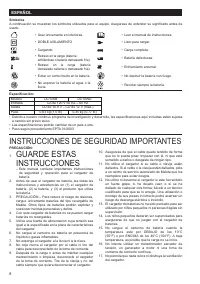
1. Fix the two screws for hanging on the wall as
illustrated. (Fig. 3)
2. Hang the charger with the screws fixed in step 1.
3. Mount the charger on the wall by tightening the
anchor screw completely. (Fig. 4)
(For DC10SB it is needed one more screw for
supporting the charger on the wall.)
FRANÇAIS
Symboles
Les symboles utilisés pour l’équipement sont indiqués ci-dessous. Assurez-vous d’avoir compris leur signification
avant l’utilisation.
• Pour usage intérieur uniquement.
• Veuillez lire le mode d’emploi.
• DOUBLE ISOLATION
• Prêt pour la charge.
• Charge en cours.
• Charge terminée.
• Charge retardée (batterie en cours
de refroidissement ou batterie trop
froide).
• Batterie défectueuse.
• Charge retardée (batterie trop
chaude ou trop froide).
• Anomalie de refroidissement.
• Ne pas court-circuiter la batterie.
• Ne pas détruire la batterie par le feu.
• Ne pas exposer la batterie à l’eau
ou à la pluie.
• Recyclez toujours la batterie.
Spécifications :
Modèle
DC10SB
DC10WD
Entrée
C.A. 120 V 50 – 60 HZ
Sortie
C.C. 10,8 V – C.C. 12 V (max.)
Poids
0,63 kg (1,5 lb)
0,35 kg (0,77 lb)
• En raison de notre programme continu de recherche et développement, les présentes spécifications peuvent être
modifiées sans préavis.
• Les spécifications peuvent varier selon les pays.
• Poids selon la procédure EPTA 01/2003
"Cargando la instrucción" significa que debes esperar hasta que el archivo se cargue y puedas leerlo en línea. Algunas instrucciones son muy grandes y el tiempo de carga depende de la velocidad de tu conexión a Internet.
Resumen
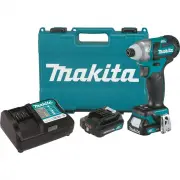
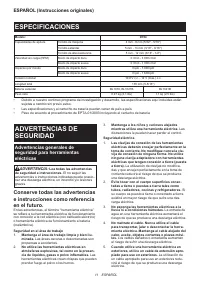
11 ESPAÑOL ESPAÑOL (Instrucciones originales) ESPECIFICACIONES Modelo: DT04 Capacidades de apriete Tornillo de máquina 4 mm - 8 mm (5/32" - 5/16") Tornillo estándar 5 mm - 14 mm (3/16" - 9/16") Tornillo de alta resistencia 5 mm - 12 mm (3/16" - 1/2") Velocidad sin carga (RPM)...
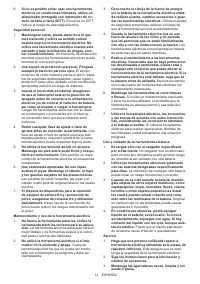
13 ESPAÑOL Advertencias de seguridad para el atornillador de impacto inalámbrico 1. Sujete la herramienta eléctrica por las super- ficies de agarre aisladas al realizar una ope - ración en la que el sujetador pueda entrar en contacto con cables ocultos. Si el sujetador entra en contacto con un cable...
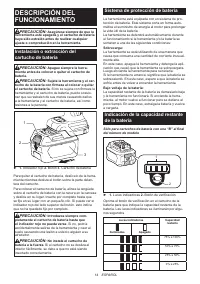
14 ESPAÑOL DESCRIPCIÓN DEL FUNCIONAMIENTO PRECAUCIÓN: Asegúrese siempre de que la herramienta esté apagada y el cartucho de batería haya sido extraído antes de realizar cualquier ajuste o comprobación en la herramienta. Instalación o extracción del cartucho de batería PRECAUCIÓN: Apague siempre la...
Otros modelos de controladores de impacto Makita
-
 Makita DDF451RFE
-
 Makita DFS451RFE
-
 Makita DHP482RFE3
-
 Makita DHP482RMJ
-
 Makita DHP484RFE
-
 Makita DT03R1
-
 Makita DT04Z
-
 Makita FS4200
-
 Makita FS6200
-
 Makita GDT01D