Beurer HK53 - Manual de uso - Página 3

Índice:
- Página 2 – Bestimmungsgemäße Verwendung; ACHTUNG; Limpieza y cuidado
- Página 4 – Utilisation conforme aux recommandations; ATTENTION; Mise sous tension; Réglage de la température; apagada
- Página 5 – ESPAÑOL; Contenido; Explicación de los símbolos
- Página 6 – Artículos suministrados; Descripción del aparato; ADVERTENCIA
- Página 8 – Uso correcto del aparato; ATENCIÓN
- Página 9 – mente posibles quemaduras en la piel.
- Página 10 – guardado para evitar que se estropee.; Resolución de problemas
- Página 13 – en düşük sıcaklık kademesini ayarlamanızı öneririz.
- Página 14 – Использование по назначению; Подготовка к работе; ВНИМАНИЕ
- Página 15 – Użytkowanie zgodne z przeznaczeniem; UWAGA; Ustawianie temperatury
12
3. Intended use
CAUTION
This heating pad is only designed to warm up the human body.
4. Operation
4.1 Safety
CAUTION
The heating pad is fitted with a SAFETY SYSTEM. This sensor technology provides protection against
overheating across the entire surface of the heating pad with an automatic switch-off in the event of a
fault. If the SAFETY SYSTEM has switched off the heating pad, the temperature settings are no longer
illuminated when switched on. Please note that for safety reasons, the heating pad can no longer be
operated after a fault has occurred and must be sent to the specified service address.
Do not connect the defective heat pad with another controller of the same type. This would trigger a
permanent switch-off via the controller safety system.
4.2 Initial use
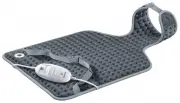
The exclusive shape of this heating pad was developed specifically for use
on the back and neck. Position the heating pad on the back so that the hook
and loop fastener on the neck part is in line with your neck. Then close the
hook and loop fastener. Adjust the length of the abdominal belt so that you
are comfortable and fasten the buckle by fitting one end into the other.
To undo the buckle, push both sides of the clasp together as shown in the
image.
CAUTION
Ensure that the heating pad will not bunch up or become folded during use.
• First, connect the controller to the heating pad by inserting the plug-in coupling.
• Then plug the mains plug into the socket.
4.3 Switching on
To switch the heating pad on, set the sliding switch for ON/OFF and temperature settings to setting 1, 2 or 3.
The temperature settings (4) are illuminated when switched on.
4.4 Setting the temperature
Level 0: OFF
Level 1: minimum heat
Level 2: medium heat
Level 3: maximum heat
NOTE:
• The fastest way to warm up the heating pad is to initially set the highest temperature setting.
NOTE:
These heating pads have a fast heating function, which allows the pad to warm up faster
in the first 10 minutes.
la banda abdominal y aproxime los dos extremos conectores para
cerrarlos. Para separar los extremos conectores, apriete a la vez
el dispositivo de desbloqueo tal como se indica en la imagen.
Compruebe primero que el interruptor está conectado a la almo-
hada eléctrica. Conecte el enchufe a la toma de red.
3.3 Selección de temperatura
La almohada eléctrica se calienta más rápidamente si se ajusta el escalón de temperatura
más alto. Posteriormente, si es necesario, se puede pasar a un escalón más bajo. Tras
encender la almohada eléctrica, el indicador del escalón de temperatura seleccionado
parpadea brevemente y después se enciende. Se recomienda utilizar el escalón de
temperatura más bajo en caso de uso prolongado de la almohada eléctrica.
3.4 Escalones de temperatura
Escalón: 0
=
apagada
1
=
calor mínimo
2
=
calor medio
3
=
calor máximo
3.5 Calentamiento rápido
Esta almohada eléctrica cuenta con un sistema calentamiento rápido que permite que
se caliente rápidamente en 10 minutos.
3.6 Sistema de desconexión automática
La almohada eléctrica se desconecta automáticamente después de unos 90 minutos. En
este momento el indicador del escalón de temperatura comienza a parpadear. Para volver
a encender la almohada eléctrica, coloque el interruptor en la posición “0” y después
de unos 5 segundos seleccione el escalón de temperatura deseado. Desconecte la
almohada eléctrica (escalón “0”) o desenchufe el cable de la caja de toma de red, si la
almohada eléctrica no se continuará utilizando después de apagarla.
4. Datos técnicos
Tipo: P10 F
Alimentación de tensión: 220–240 V / 50-60 Hz
Potencia absorbida: 100 W
Dimensiones: aproximadamente 54 x 38 cm
Fabricante: MGG Elektro GmbH, Königsbrückerstr. 61, 01099 Dresden, Germany
5. Limpieza y cuidado
Antes de limpiar la almohada
eléctrica desenchufe siemp-
re el cable de la caja de toma de red.
Primero abra la cremallera de la funda textil y
extraiga la almohada eléctrica. La funda textil
puede lavarse de acuerdo con los símbolos
de limpieza indicados en la etiqueta.
Las pequeñas manchas de la almohada eléc-
trica pueden ser eliminadas mediante
un paño o una esponja húme-
da y eventualmente con un
detergente líquido para ropa
blanca fina. Para la limpieza nunca utilice
detergentes que contengan diluyentes.
"Cargando la instrucción" significa que debes esperar hasta que el archivo se cargue y puedas leerlo en línea. Algunas instrucciones son muy grandes y el tiempo de carga depende de la velocidad de tu conexión a Internet.
Resumen
5 • Sollten Sie noch Fragen zur Anwendung unserer Geräte haben, so wenden Sie sich bitte an unseren Kundenservice. 3. Bestimmungsgemäße Verwendung ACHTUNG Dieses Heizkissen ist nur zur Erwärmung des menschlichen Körpers bestimmt. 4. Bedienung 4.1 Sicherheit ACHTUNG Das Heizkissen ist mit einem SICHE...
19 • Respectez impérativement les consignes d‘utilisation (chapitre 4) ain- si que celles d‘entretien et de nettoyage (chapitre 5) et de rangement (chapitre 6). • Pour toute question concernant l’utilisation de nos appareils, adres- sez-vous à notre service clients. 3. Utilisation conforme aux recom...
23 ESPAÑOL Contenido 1. Artículos suministrados ...................................... 24 1.1 Descripción del aparato .............................. 24 2. Indicaciones importantes Consérvelas para futuras consultas. .................. 24 3. Uso correcto del aparato .....................................


