Whirlpool CGSP2978JQ - Manual de uso
Whirlpool CGSP2978JQ - Manual de uso, léela gratuitamente en línea en formato PDF. Esperamos que esto te ayude a resolver cualquier duda que puedas tener. Si tienes más preguntas, contáctanos a través del formulario de contacto.


Índice:
- Página 2 – SEGURIDAD DE LA SECADORA; Su seguridad y la seguridad de los demás es muy importante.; ADVERTENCIA; INSTRUCCIONES IMPORTANTES DE SEGURIDAD; GUARDE ESTAS INSTRUCCIONES; “Riesgo de Incendio”
- Página 4 – INSTRUCCIONES DE SEGURIDAD IMPORTANTES
- Página 5 – HERRAMIENTAS Y PIEZAS; Herramientas necesarias:
- Página 6 – DIMENSIONES Y ESPACIOS LIBRES
- Página 7 – REQUISITOS DE LA UBICACIÓN; Necesitará lo siguiente:; Cuando instale una secadora a gas:
- Página 8 – Conexión a tierra de la secadora a gas; REQUISITOS DE GAS; Suministro de gas; INSTRUCCIONES DE PUESTA A TIERRA
- Página 9 – Es su responsabilidad:
- Página 10 – REQUISITOS DE VENTILACIÓN
- Página 12 – Ventilación para múltiples secadoras; PATAS NIVELADORAS
- Página 13 – Las patas ya se han instalado en esta unidad.; NIVELACIÓN; Conexión del suministro de gas
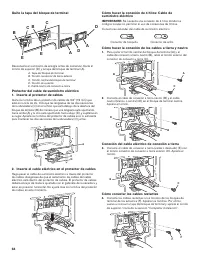
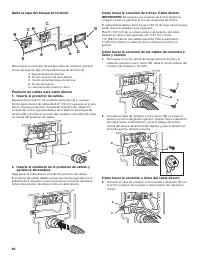
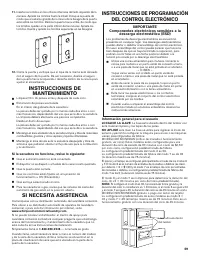
- Página 15 – Inserte el protector de cables
- Página 17 – Quite la tapa del bloque de terminal; Inserte el protector de cables.
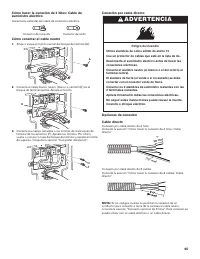
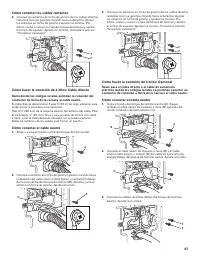
- Página 18 – Cómo conectar el cable neutro
- Página 19 – Cómo quitar el ensamblaje de la puerta
- Página 20 – Si la secadora no funciona, revise lo siguiente:; SI NECESITA ASISTENCIA; IMPORTANTE; Información general para el usuario
- Página 24 – MENÚ USB
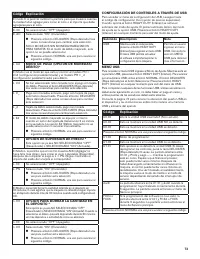
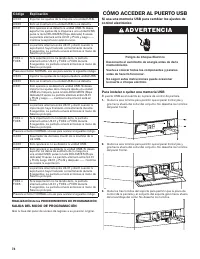
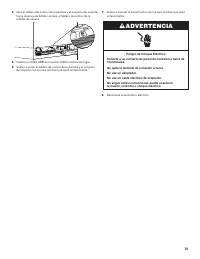
- Página 25 – SALIDA DEL MODO DE PROGRAMACIÓN; CÓMO ACCEDER AL PUERTO USB; Si usa una memoria USB para cambiar los ajustes de; Para instalar o quitar una memoria USB
INSTALLATION INSTRUCTIONS
Commercial Stacked Dryer Gas or Electric
DRYER SAFETY ............................................ 2
TOOLS & PARTS ........................................... 5
DIMENSIONS/CLEARANCES ................... 6
LOCATION REQUIREMENTS ..................... 7
GAS DRYER ELECTRICAL
REQUIREMENTS .......................................... 7
GAS REQUIREMENTS ............................... 8
ELECTRIC DRYER ELECTRICAL
REQUIREMENTS - U.S.A. ONLY ............... 9
DRYER VENTING REQUIREMENTS ...... 10
LEVELING FEET .......................................... 12
LEVELING ..................................................... 12
GAS SUPPLY CONNECTION ................... 13
ELECTRIC DRYER ELECTRICAL
CONNECTIONS - U.S.A. ONLY ................ 14
COMPLETE INSTALLATION ..................... 18
REVERSING DRYER DOOR SWING
(OPTIONAL) ................................................. 18
MAINTENANCE INSTRUCTIONS ............ 19
IF YOU NEED ASSISTANCE .................... 19
ELECTRONIC CONTROL SETUP
INSTRUCTIONS .......................................... 20
ACCESS TO USB PORT ............................ 25
SÉCURITÉ DE LA SÉCHEUSE ................. 26
OUTILS ET PIÈCES .................................... 29
DIMENSIONS/DISTANCES DE
DÉGAGEMENT ............................................ 30
EXIGENCES D’EMPLACEMENT ............. 31
SPÉCIFICATIONS ÉLECTRIQUES DE
LA SÉCHEUSE À GAZ ............................... 32
EXIGENCES CONCERNANT
L’ALIMENTATION EN GAZ ........................ 32
SPÉCIFICATIONS ÉLECTRIQUES
DE LA SÉCHEUSE ÉLECTRIQUE –
E.-U. SEULEMENT ...................................... 33
EXIGENCES CONCERNANT
L’ÉVACUATION DE LA SÉCHEUSE ........ 34
PIEDS DE NIVELLEMENT ......................... 36
NIVELLEMENT ............................................. 37
RACCORDEMENT DE L’ALIMENTATION
EN GAZ .......................................................... 37
CONNEXIONS ÉLECTRIQUES DE
LA SÉCHEUSE ÉLECTRIQUE –
É.-U. SEULEMENT ...................................... 38
FIN DE L’INSTALLATION ........................... 43
INVERSION DU SENS D’OUVERTURE
DE LA PORTE DE LA SÉCHEUSE
(OPTIONNEL) ............................................... 43
INSTRUCTIONS D’ENTRETIEN ............... 44
EN CAS DE BESOIN D’ASSISTANCE .... 44
INSTRUCTIONS DE CONFIGURATION
DES COMMANDES ÉLECTRONIQUES ... 44
ACCÈS AU PORT USB .............................. 49
SEGURIDAD DE LA SECADORA ............ 51
HERRAMIENTAS Y PIEZAS ..................... 54
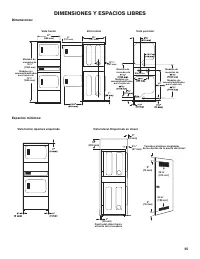
DIMENSIONES Y ESPACIOS LIBRES .. 55
REQUISITOS DE LA UBICACIÓN ........... 56
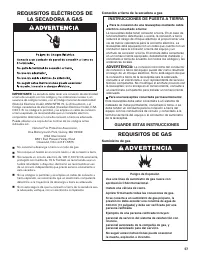
REQUISITOS ELÉCTRICOS DE
LA SECADORA A GAS .............................. 57
REQUISITOS DE GAS ............................... 57
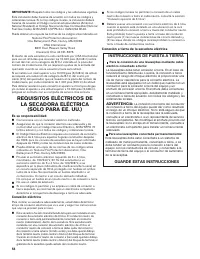
REQUISITOS ELÉCTRICOS DE
LA SECADORA ELÉCTRICA
(SOLO PARA EE. UU.) ............................... 58
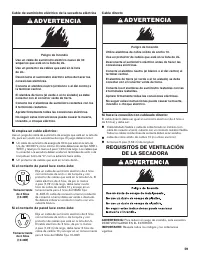
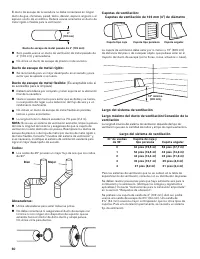
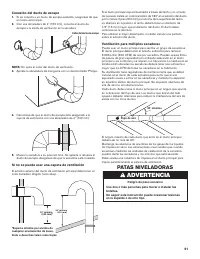
REQUISITOS DE VENTILACIÓN DE
LA SECADORA ............................................ 59
PATAS NIVELADORAS .............................. 61
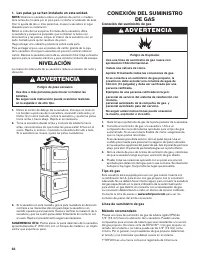
NIVELACIÓN ................................................ 62
CONEXIÓN DEL SUMINISTRO DE GAS ... 62
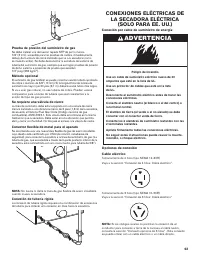
CONEXIONES ELÉCTRICAS DE LA
SECADORA ELÉCTRICA
(SOLO PARA EE. UU.) ............................... 63
INSTALACIÓN COMPLETA ...................... 68
CAMBIO DE SENTIDO DE LA
APERTURA DE LA PUERTA
(OPCIONAL) ................................................. 68
INSTRUCCIONES DE
MANTENIMIENTO ...................................... 69
SI NECESITA ASISTENCIA ...................... 69
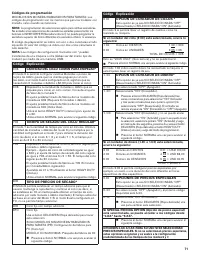
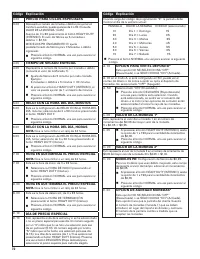
INSTRUCCIONES DE PROGRAMACIÓN
DEL CONTROL ELECTRÓNICO ............... 69
CÓMO ACCEDER AL PUERTO USB ...... 74
TABLE OF CONTENTS
W11647901B
INSTRUCTIONS D’INSTALLATION
Sécheuse commerciale superposée (gaz et électrique)
INSTRUCCIONES DE INSTALACIÓN
Secadora apiladas comerciales eléctricas o a gas
TABLE DES MATIÈRES
ÍNDICE
"Cargando la instrucción" significa que debes esperar hasta que el archivo se cargue y puedas leerlo en línea. Algunas instrucciones son muy grandes y el tiempo de carga depende de la velocidad de tu conexión a Internet.
Resumen
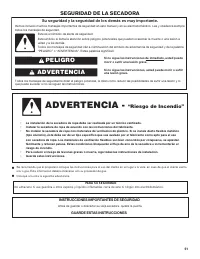
51 SEGURIDAD DE LA SECADORA ■ Se recomienda que el propietario coloque las instrucciones para el uso del cliente en un lugar a la vista, en caso de que el cliente sienta olor a gas. Esta información deberá obtenerse con su proveedor de gas. ■ Coloque a la vista la siguiente advertencia. Si no sigue ...
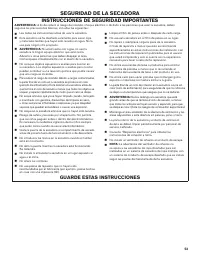
53 SEGURIDAD DE LA SECADORA INSTRUCCIONES DE SEGURIDAD IMPORTANTES ADVERTENCIA: A fin de reducir el riesgo de incendio, choque eléctrico o de daño a las personas que usen la secadora, deben seguirse las precauciones básicas, incluidas las siguientes: ■ Lea todas las instrucciones antes de usar la se...
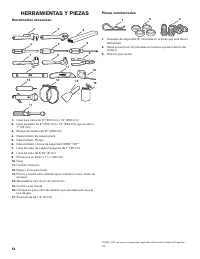
54 HERRAMIENTAS Y PIEZAS Herramientas necesarias: 1 2 3 4 5 6 7 8 9 10 11 13 12 16 14 17 15 1. Llave para tubos de 8" (200 mm) o 10" (250 mm) 2. Llave ajustable de 8" (200 mm) o 10" (250 mm) que se abra a 1" (25 mm) 3. Bloque de madera de 27" (686 mm) 4. Destornillador de cab...