Hamilton Beach 48463 - Manual de uso
Máquina de café Hamilton Beach 48463 - Manual de uso, léela gratuitamente en línea en formato PDF. Esperamos que esto te ayude a resolver cualquier duda que puedas tener. Si tienes más preguntas, contáctanos a través del formulario de contacto.

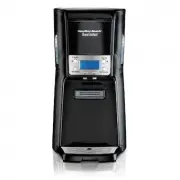
BrewStation
®
Le invitamos a leer cuidadosamente este instructivo antes
de usar su aparato.
Read before use.
Lire avant utilisation.
Lea antes de usar.
In an effort to reduce paper waste, Hamilton Beach Brands,
Inc. has reduced the size of this Use and Care guide and
made it available online. We believe strongly in doing our
part to help care for the environment. To view Use and Care
guides, recipes, and tips, please visit:
USA : hamiltonbeach.com | 1.800.851.8900
Aidez-vous à protéger l’environnement
Dans le but de réduire la consommation de papier,
Hamilton Beach Brands, Inc. a réduit le format des manuels
d’utilisation et d’entretien et offre maintenant la version
complète en ligne. Nous croyons fermement que nous
contribuons à sauvegarder l’environnement. Pour voir les
manuels d’utilisation et d’entretien, les recettes et les
conseils, veuillez consulter le site :
Canada : hamiltonbeach.ca | 1.800.267.2826
Ayude a Hamilton Beach a Hacer la Diferencia
En un esfuerzo por reducir el papel de desecho, Hamilton
Beach Brands, Inc., ha reducido el tamaño de este
Uso y Cuidado y lo puso disponible en línea. Creemos
fuertemente en hacer nuestra parte para ayudar a cuidar
el medioambiente. Para ver guías de Uso y Cuidado,
recetas y consejos, por favor visite:
México: hamiltonbeach.com.mx | 800.71.16.100
IMPORTANT SAFEGUARDS
When using electrical appliances, basic safety precautions
should always be followed to reduce the risk of fire, electric
shock, and/or injury to persons, including the following:
1. Read all instructions.
2. This appliance is not intended for use by persons
(including children) with reduced physical, sensory,
or mental capabilities, or lack of experience and
knowledge, unless they are closely supervised and
instructed concerning use of the appliance by a person
responsible for their safety.
3. Close supervision is necessary when any appliance is
used by or near children. Children should be supervised
to ensure that they do not play with the appliance.
4. Do not touch hot surfaces. Use handles or knobs. Care
must be taken, as burns can occur from touching hot
parts or from spilled, hot liquid.
5. To protect against electric shock, do not place cord,
plug, or BrewStation
®
in water or other liquid.
6. Unplug from outlet when either the BrewStation
®
or clock is
not in use and before cleaning. Allow to cool before putting
on or taking off parts and before cleaning the appliance.
7. Scalding may occur if the lid is lifted during the brewing cycle.
Do not open lid until coffeemaker has cooled completely.
8. BrewStation
®
must be operated on a flat surface away
from the edge of counter to prevent accidental tipping.
9. Do not operate any appliance with a damaged supply
cord or plug, or after the appliance malfunctions or
has been dropped or damaged in any manner. Supply
cord replacement and repairs must be conducted
by the manufacturer, its service agent, or similarly
qualified persons in order to avoid a hazard. Call the
provided customer service number for information on
examination, repair, or adjustment.
10. The use of accessory attachments not recommended by
the appliance manufacturer may cause injuries.
11. Do not use outdoors.
12. Do not let cord hang over edge of table or counter or
touch hot surfaces, including stove.
13. The coffee tank is designed for use with this
BrewStation
®
. It must never be used on a range top or
in a microwave oven.
14. Do not place BrewStation
®
on or near a hot gas or
electric burner or in a heated oven.
15. To disconnect BrewStation
®
, turn controls to OFF; then
remove plug from wall outlet.
16.
WARNING!
To reduce the risk of fire or electric shock, do
not remove the bottom cover. No user-serviceable parts
are inside. Repair should be done by authorized service
personnel only.
17. Do not use appliance for other than intended use.
18. Do not place coffeemaker in a cabinet when in use.
SAVE THESE INSTRUCTIONS
Other Consumer Safety Information
This appliance is intended for household use only.
w
WARNING
Shock Hazard:
This appliance has a
polarized plug (one wide blade) that reduces the risk of electric
shock. The plug fits only one way into a polarized outlet. Do
not defeat the safety purpose of the plug by modifying the plug
in any way or by using an adapter. If the plug does not fit fully
into the outlet, reverse the plug. If it still does not fit, have an
electrician replace the outlet.
The length of the cord used on this appliance was selected
to reduce the hazards of becoming tangled in or tripping over
a longer cord. If a longer cord is necessary, an approved
extension cord may be used. The electrical rating of the
extension cord must be equal to or greater than the rating of the
appliance. Care must be taken to arrange the extension cord
so that it will not drape over the countertop or tabletop where it
can be pulled on by children or accidentally tripped over.
To avoid an electrical circuit overload, do not use another high-
wattage appliance on the same circuit with this appliance.
IMPORTANT:
Never use coffee tank to pour hot coffee or carry
hot coffee. Handle coffee tank when it holds only cold water.
Additional Information
• If overflow occurs: Let unit, coffee, and grounds cool
completely before attempting any cleanup.
• Use only brand-name, high-quality filters.
• Use only 1 Tablespoon of ground coffee for each cup of
water.
• Use coffeemaker cleaner to prevent hard water deposits
that affect coffeemaker performance. Clean monthly.
• Do not clean coffee tank in dishwasher.
• Read instructions before using.
Parts and features
1. Filter Basket
2. Coffee Tank
3. Coffee Level Guide
4. Drip Tray
5. Control Panel and
Display (on select models)
6. Coffee Dispenser Bar
7. Water Reservoir
8. Keep Warm Plate
9. Lid
10. Water Level Guide
NOTE:
Picture references
major components for all
coffeemakers covered by
these instructions.
OR
OU
How to make coffee
w
WARNING
Burn Hazard.
• Never use coffee tank to pour or carry hot coffee.
• Handle coffee tank only when holding cold water for filling
water reservoir and to clean tank.
• If BrewStation
®
overflows, unplug unit. Allow unit, coffee,
and grounds to cool before cleaning unit, coffee, or grounds.
BEFORE FIRST USE:
Wash coffee tank, filter basket,
and drip tray in hot, soapy water. NEVER put the coffee
tank in dishwasher. BrewStation
®
can be programmed to
automatically shut off in 0 (for Iced Coffee), 1, 2, 3, or 4 hours
as desired. Default is 4 hours for automatic shutoff.
1.
Place a cupcake-style paper filter in filter basket. A
permanent filter may also be used.
2.
For each cup of coffee being made, place one level
Tablespoon of coffee into filter. Avoid getting coffee
grounds in any other areas of the BrewStation
®
.
3.
Fill coffee tank with the desired amount of cold tap water.
4.
Lift lid and pour water from coffee tank into water
reservoir.
5.
Set
KEEP WARM HOURS
to 1, 2, 3, or 4. The 0 setting is
for iced coffee.
6.
Press
ON/OFF
or button to start. An illuminated red light
on the
ON/OFF
or button indicates coffeemaker is on.
7.
Coffeemaker will beep one time when brewing is complete.
Press coffee dispensing bar with mug to dispense coffee.
BOLD:
For enhanced full/strong-flavored coffee, press
BREW
STRENGTH/BREW OPTIONS
button until
BOLD
is displayed.
1–4 CUPS:
When brewing 1–4 cups of coffee, press
BREW
STRENGTH/BREW OPTIONS
button until
1–4 CUPS
is displayed.
NOTE:
BOLD
and
1–4 CUPS
modes will require additional
time to complete a brewing cycle. A Brew Option must be
selected prior to pressing the
ON/OFF
or button. The setting
cannot be changed during/in brew mode. If a Brew Option is
not selected, the coffeemaker will automatically brew on the
regular/default setting.
TO REHEAT COFFEE:
Press and hold
ON/OFF
or button for
3 seconds. This will reset the timer and keep coffee warm for
selected number of hours (1, 2, 3, or 4).
How to make iced coffee
1.
Follow Steps 1 through 4 in “How to make coffee”
section. Do not fill coffee tank beyond the 6-cup line
when making iced coffee.
NOTE:
Brew double-strength
coffee for iced coffee. Add 2 scoops (optional accessory)
or 2 level Tablespoons of ground coffee per cup (up to 12
scoops).
2.
Fill coffee tank with ice to the 10 CUP marking line.
3.
Set
KEEP WARM HOURS
to 0. Press
ON/OFF
or .
4.
Press coffee dispensing bar with glass full of ice to
dispense coffee.
Care and cleaning
3.
Press
ON
or . Turn
OFF
or after 20 seconds and wait
30 minutes. Press
ON
or . Turn
OFF
or when finished.
When cool, dispense several cups before emptying and
rinsing reservoir.
NOTE:
Coffeemaker will remind you it is time for cleaning
in two ways:
• Built-in cycle timer—Every 30 cycles, CLEAN or will
flash in display and stay illuminated for 2 cycles.
• Built-in residue sensor—CLEAN or will appear in
display when unit senses residue buildup and remain
illuminated until the unit has been cleaned.
4.
Run 2–3 more brew cycles with CLEAN WATER only. Allow
to cool between cycles.
Filter basket and coffee tank:
Remove the filter basket and
coffee tank and wash by hand with warm, soapy water. Filter
basket may also be cleaned in top rack of dishwasher. Clean
filter basket often.
Outside of coffeemaker:
Wipe outside with a soft cloth and
warm, soapy water. Do not use abrasive cleaners, since they
will scratch the finish of the product.
Troubleshooting
Coffee leaks from dispenser.
• Coffee grounds trapped in coffee tank dispensing mechanism
under seal in coffee tank. See “Care and cleaning: Inside of
coffeemaker.”
CLEAN appears in display.
• This is a reminder to clean coffeemaker. See “Care and
cleaning: Inside of coffeemaker.”
Coffee tastes bad.
• Coffeemaker needs cleaning.
• Coffee ground too coarsely or too finely. Set coffee grinder to
automatic drip grind.
• Coffee-to-water ratio unbalanced. Adjust for personal
preference.
• Poor water quality. Use water filter or bottled water to make
coffee.
Coffee not brewing or stops brewing/unit will not turn on.
• Mineral deposits have built up. Clean the coffeemaker
following “Care and cleaning: Inside of coffeemaker.”
• Water reservoir is empty.
• Unit is unplugged.
• Power outage or power surge. If surge, unplug; then plug
back in.
Coffee brews slowly.
• Coffeemaker needs cleaning. Clean at least every 30 days to
maintain proper performance.
• Coffeemaker is in the
1–4
CUPS or
BOLD
modes. Press Brew
Mode button until no lights appear.
Coffee overflows basket.
• Excessive amounts of coffee grounds.
• Coffee ground too finely. Set coffee grinder to automatic drip
grind.
• More than one paper filter in filter basket. Poor quality paper
filter or wrong size paper filter.
Unit beeps continuously/will not brew and/or POUR
WATER appears in display.
• No water in reservoir. Transfer water from coffee tank to
reservoir.
Coffee is cold when dispensed.
• Selected Keep Warm Hours have elapsed and coffeemaker
has automatically shut off. See “TO REHEAT COFFEE”
instructions, or brew new cycle.
PRÉCAUTIONS IMPORTANTES
Pour utiliser un appareil électroménager, vous devez toujours
prendre des mesures élémentaires de sécurité pour réduire le risque
d’incendie, d’électrocution et/ou de blessure corporelle, en particulier
les mesures suivantes :
1. Lire toutes les instructions.
2. Cet appareil n’est pas destiné à être utilisé par des personnes (y
compris les enfants) dont les capacités physiques, sensorielles
ou mentales sont réduites, ou manquant d’expérience et
de connaissance, sauf si elles sont étroitement surveillées
et instruites sur l’utilisation de l’appareil par une personne
responsable de leur sécurité.
3. Une surveillance étroite est requise pour tout appareil utilisé par
ou près des enfants. Surveiller que les enfants ne jouent pas
avec l’appareil.
4. Ne pas toucher aux surfaces chaudes. Utiliser les poignées
ou les boutons. Prendre toutes les précautions nécessaires
pour éviter les brûlures causées par les surfaces chaudes, les
déversements et le liquide chaud.
5. Pour éviter les risques d’électrocution, ne pas placer le cordon,
la fiche ou la cafetière BrewStation
®
dans l’eau ou tout autre
liquide.
6. Débrancher de la prise murale lorsque la cafetière
BrewStation
®
ou l’horloge n’est pas utilisée et avant le
nettoyage. Laisser refroidir la cafetière avant d’installer ou de
retirer des pièces et avant de la nettoyer.
7. Des éclaboussures peuvent survenir si le couvercle est soulevé
pendant le cycle d’infusion. Ne pas ouvrir le couvercle tant que
la cafetière n’est pas complètement refroidie.
8. La cafetière BrewStation
®
doit fonctionner sur une surface
plane, loin du rebord de comptoir pour éviter le basculement
accidentel.
9. Ne pas faire fonctionner un appareil électroménager avec un
cordon ou une fiche endommagée, ou lorsque l’appareil ne
fonctionne pas bien ou a été échappé ou endommagé d’une
manière quelconque. Le remplacement et la réparation du
cordon d’alimentation doivent être faits par le fabricant, son
agent de service ou toute personne qualifiée de façon à éviter
tout danger. Appeler le numéro de service à la clientèle fourni
pour des renseignements concernant l’examen, la réparation ou
l’ajustement.
10. L’utilisation de tout autre accessoire contre-indiqué par le
fabricant de l’appareil peut causer des blessures.
11. Ne pas utiliser à l’extérieur.
12. Ne pas laisser pendre le cordon de la table ou du comptoir
et éviter tout contact avec les surfaces chaudes incluant la
cuisinière.
13. Le réservoir de café est conçu pour être utilisé avec cette
cafetière BrewStation
®
. Elle ne doit jamais être utilisée sur une
table de cuisson ou dans un four à micro-ondes.
14. Ne pas placer la cafetière BrewStation
®
sur ou près d’un
brûleur à gaz ou électrique ou dans un four chaud.
15. Pour débrancher la cafetière BrewStation
®
, mettre la cafetière
hors tension en tournant les commandes à OFF (arrêt) puis
débrancher la fiche de la prise murale.
16.
AVERTISSEMENT !
Pour éviter les risques d’incendie et
d’électrocution, ne pas enlever le couvercle inférieur de la
cafetière. Aucune pièce réparable à l’intérieur. Les réparations
doivent être faites par un technicien agréé seulement.
17. Ne pas utiliser l’appareil électroménager à une fin autre que
celle prévue.
18. Ne pas mettre la cafetière dans une armoire lors de l’utilisation.
Pièces et caractéristiques
1. Panier-filtre
2. Réservoir de café
3. Guide de niveau de café
4. Ramasse-gouttes
5. Panneau de commandes
et afficheur
(sur certains modèles)
6. Barre de la distributrice
de café
7. Réservoir d’eau
8. Réchaud
9. Couvercle
10. Guide de niveau d’eau
REMARQUE :
Les illustrations
montrent les composantes
importantes de toutes les
cafetières relatives aux
présentes instructions.
Programming
1.
To set clock: Press
H
and then
M
.
NOTE:
Clock time must
be set for programming function to work.
2.
To program auto brew: Press and hold
START TIME
or
PROG
until clock flashes.
START TIME
will appear in
display.
3.
Continue holding
START TIME
or
PROG
; then press
H
and
M
until the desired brewing start time is reached.
4.
Press and release
START TIME
or
PROG
to activate
automatic brewing. A green light will signal that the unit
is in program mode.
This warranty applies to products purchased and used in the
U.S. and Canada. This is the only express warranty for this
product and is in lieu of any other warranty or condition.
This product is warranted to be free from defects in material
and workmanship for a period of one (1) year from the date of
original purchase. During this period, your exclusive remedy is
repair or replacement of this product or any component found
to be defective, at our option; however, you are responsible for
all costs associated with returning the product to us and our
returning a product or component under this warranty to you. If
the product or component is no longer available, we will replace
with a similar one of equal or greater value.
This warranty does not cover glass, filters, wear from normal
use, use not in conformity with the printed directions, or
damage to the product resulting from accident, alteration,
abuse, or misuse. This warranty extends only to the original
consumer purchaser or gift recipient. Keep the original sales
receipt, as proof of purchase is required to make a warranty
claim. This warranty is void if the product is used for other than
single-family household use or subjected to any voltage and
waveform other than as specified on the rating label
(e.g., 120V ~ 60 Hz).
We exclude all claims for special, incidental, and consequential
damages caused by breach of express or implied warranty. All
liability is limited to the amount of the purchase price.
Every
implied warranty, including any statutory warranty or
condition of merchantability or fitness for a particular
purpose, is disclaimed except to the extent prohibited by
law, in which case such warranty or condition is limited
to the duration of this written warranty.
This warranty gives
you specific legal rights. You may have other legal rights that
vary depending on where you live. Some states or provinces do
not allow limitations on implied warranties or special, incidental,
or consequential damages, so the foregoing limitations may not
apply to you.
To make a warranty claim, do not return this appliance to the
store. Please call 1.800.851.8900 in the U.S. or 1.800.267.2826
in Canada or visit hamiltonbeach.com in the U.S. or
hamiltonbeach.ca in Canada. For faster service, locate the
model, type, and series numbers on your appliance.
Limited warranty
Care and cleaning
w
WARNING
Burn Hazard.
Do not immerse cord, plug, or coffeemaker in any liquid.
Clean BrewStation
®
at least once a month (once a week for
areas with hard water).
Inside of coffeemaker:
1.
Remove optional water filter.
2.
Pour 1 pint (2 cups/500 ml) vinegar into water reservoir.
CONSERVER CES INSTRUCTIONS
Autres consignes de sécurité
pour le consommateur
Cet appareil est conçu pour une utilisation domestique
seulement.
w
AVERTISSEMENT
Risque d’électrocution :
Cet appareil
électroménager possède une fiche polarisée (une broche large)
qui réduit le risque d’électrocution. Cette fiche n’entre que dans
un seul sens dans une prise polarisée. Ne contrecarrez pas
l’objectif sécuritaire de cette fiche en la modifiant de quelque
manière que ce soit ou en utilisant un adaptateur. Si vous ne
pouvez pas insérer complètement la fiche dans la prise, inversez
la fiche. Si elle refuse toujours de s’insérer, faire remplacer la
prise par un électricien.
La longueur du cordon installé sur cet appareil a été sélectionnée
afin de réduire les risques d’enchevêtrement ou de faux pas
causés par un fil trop long. L’utilisation d’une rallonge approuvée
est permise si le cordon est trop court. Les caractéristiques
électriques de la rallonge doivent être équivalentes ou supérieures
aux caractéristiques de l’appareil. Prendre toutes les précautions
nécessaires pour installer la rallonge de manière à ne pas la faire
courir sur le comptoir ou sur une table pour éviter qu’un enfant ne
tire sur le cordon ou trébuche accidentellement.
Pour éviter la surcharge du circuit électrique, ne pas utiliser un
autre appareil à haute puissance sur le même circuit que cet
appareil.
IMPORTANT :
Ne jamais utiliser le réservoir de café pour verser
ou transporter le café chaud. Ne manipuler le réservoir de café
que lorsqu’il ne contient que de l’eau froide.
Information additionnelle :
• Si un débordement survient : Laisser refroidir complètement la
cafetière et la mouture avant d’effectuer tout nettoyage.
• Utiliser uniquement les filtres de grande qualité et de marque.
• Utiliser uniquement 1 cuillère à soupe de café moulu pour
chaque tasse d’eau.
• Utiliser un nettoyant pour cafetière pour prévenir les dépôts
calcaires qui nuisent à la performance des cafetières. Nettoyer
tous les mois.
• Le réservoir de café n’est pas conçu pour aller au lave-vaisselle.
• Lire les instructions avant l’utilisation.
Préparation du café
w
AVERTISSEMENT
Risque de brûlure.
• Ne jamais utiliser le réservoir de café pour verser ou
transporter le café chaud.
• Manipuler le réservoir à café uniquement lorsqu’il contient
de l’eau froide pour le remplissage du réservoir d’eau et pour
nettoyer le réservoir.
• Si la cafetière BrewStation
®
déborde, débrancher l’appareil.
Laisser refroidir complètement l’appareil, le café et la
mouture avant de nettoyer l’appareil, le café et la mouture.
AVANT LA PREMIÈRE UTILISATION :
Laver le réservoir
de café, le panier-filtre et le ramasse-gouttes avec de l’eau
chaude savonneuse. NE JAMAIS mettre le réservoir de café
au lave-vaisselle. La cafetière BrewStation
®
est programmable
pour se mettre hors tension automatiquement en 0 (pour le
café glacé), 1, 2, 3 ou 4 heures selon votre besoin. La mise
hors tension automatique par défaut est réglée à 4 heures.
1.
Placer un filtre panier en papier dans le panier-filtre. Un
filtre à café réutilisable peut être utilisé.
2.
Déposer une cuillère à soupe rase de café par tasse de
café à préparer dans le filtre. Éviter la dispersion des
grains de café vers les autres parties de la cafetière.
3.
Remplir le réservoir de café avec de l’eau froide du robinet
à la quantité désirée.
4.
Soulever le couvercle et verser l’eau de le réservoir de café
dans le réservoir à eau.
5.
Régler le temps de
GARDE-AU CHAUD HRS
(Keep Warm)
à 1, 2, 3 ou 4 heures. Le réglage « 0 » est utilisé pour le
café glacé.
6.
Appuyer sur le bouton «
ON/OFF
» (marche/arrêt) ou
pour commencer l’infusion. L’affichage d’un témoin
lumineux rouge sur le bouton «
ON/OFF
» (marche/arrêt)ou
indique que la cafetière est en marche.
7.
La cafetière émettra un bip à la fin du cycle d’infusion.
Appuyer la barre de la distributrice de café avec la tasse
de café à distribuer.
BOLD (CORSÉ) :
Pour un café fort ou corsé, appuyer sur le
bouton de mode d’infusion jusqu’à ce que l’indication
«
BOLD
» s’affiche.
1–4 CUPS (1 À 4 TASSES) :
Pour l’infusion de 1 à 4 tasses de
café, appuyer sur le bouton de mode d’infusion jusqu’à ce que
«
1 à 4 TASSES
» s’affiche.
NOTE :
Les modes
CORSÉ
(
BOLD
) et
1 à 4 TASSES
(
1–4
CUPS
) nécessitent un cycle d’infusion plus long. Une option
d’infusion doit être sélectionnée avant d’appuyer sur le bouton
«
ON/OFF
» (marche/arrêt) ou de l’appareil. Le réglage ne
peut être modifié pendant/au cours du mode d’infusion. Si une
option d’infusion n’est pas sélectionnée, la cafetière infuse
automatiquement au mode de réglage par défaut/normal.
RÉCHAUFFAGE DU CAFÉ :
Appuyer et maintenir enfoncé le
bouton «
ON/OFF
» (marche/arrêt) ou pendant 3 secondes.
Ceci réinitialisera la minuterie et gardera le café au chaud
selon le nombre d’heures sélectionné (1, 2, 3 ou 4).
"Cargando la instrucción" significa que debes esperar hasta que el archivo se cargue y puedas leerlo en línea. Algunas instrucciones son muy grandes y el tiempo de carga depende de la velocidad de tu conexión a Internet.
Otros modelos de máquinas de café Hamilton Beach
-
 Hamilton Beach 40715
-
 Hamilton Beach 40726
-
 Hamilton Beach 46293
-
 Hamilton Beach 47950
-
 Hamilton Beach 49900
-
 Hamilton Beach 49901
-
 Hamilton Beach 49918
-
 Hamilton Beach 49930
-
 Hamilton Beach 49945
-
 Hamilton Beach 49948