Elastic Stitching; MENDING; JOINING FABRIC; Point élastique; Puntada elástica; Эластичная строчка; РЕМОНТ ТКАНИ; ПРИШИВАНИЕ ЭЛАСТИЧНОЙ ТЕСЬМЫ; СТАЧИВАНИЕ ТКАНЕЙ - Brother X-5 - Manual de uso - Página 32


Índice:
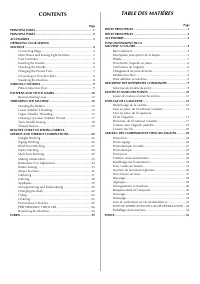
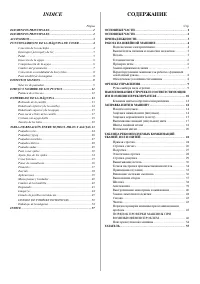
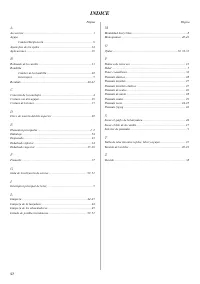
- Página 5 – INDICE; СОДЕРЖАНИЕ
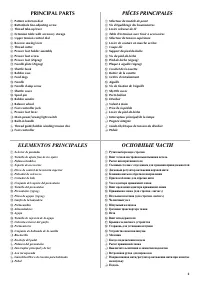
- Página 6 – PRINCIPAL PARTS; PIECES PRINCIPALES; ELEMENTOS PRINCIPALES
- Página 7 – PIÉCES PRINCIPALES
- Página 8 – ACCESSORIES; ACCESSOIRES; ПРИНАДЛЕЖНОСТИ
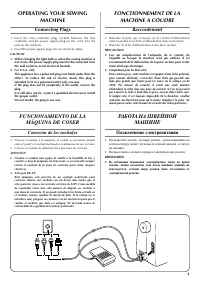
- Página 9 – Connecting Plugs; FONCTIONNEMENT DE LA; Raccordement; FUNCIONAMIENTO DE LA; Conexión de los enchufes; РАБОТА НА ШВЕЙНОЙ; Подключение электропитания
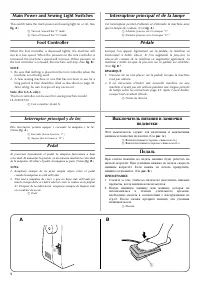
- Página 10 – Main Power and Sewing Light Switches; Foot Controller; Interrupteur principal et de la lampe; Interruptor principal y de luz; Выключатель питания и лампочки
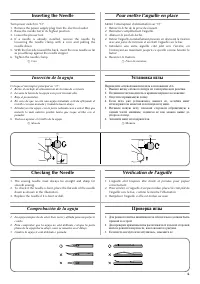
- Página 11 – Inserting the Needle; Checking the Needle; Pour mettre l’aiguille en place; Vérification de l’aiguille; Comprobación de la aguja; Установка иглы; Проверка иглы
- Página 13 – Converting to Free-Arm Style; Steadying the Machine; Modèle bras libre; Pour stabiliser la machine; Para estabilizar la máquina; Переоборудование машины для работы с; Обеспечение устойчивости машины
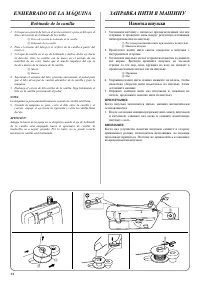
- Página 17 – ENHEBRADO DE LA MÁQUINA; Bobinado de la canilla; ЗАПРАВКА НИТИ В МАШИНУ; Намотка шпульки
- Página 23 – Costura con aguja doble; Шитье двойной иглой; УСТАНОВКА ДВОЙНОЙ ИГЛЫ; ЗАПРАВКА ДВОЙНОЙ ИГЛЫ НИТЬЮ
- Página 24 – Thread Tension; Tension des fils; Tensión de los hilos; Натяжение нитей; Возможные затруднения и методы их разрешения.; AE1 Дисковый регулятор натяжения верхней нити; BE1 Дисковый регулятор натяжения верхней нити
- Página 25 – Слишком слабое натяжение нижней нити.
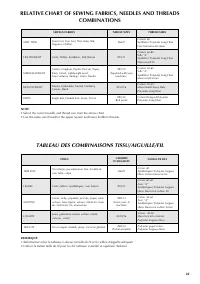
- Página 27 – TABLA DE RELACIÓN ENTRE TEJIDOS, HILOS Y AGUJAS; ТАБЛИЦА РЕКОМЕНДУЕМЫХ КОМБИНАЦИЙ ТКАНЕЙ,
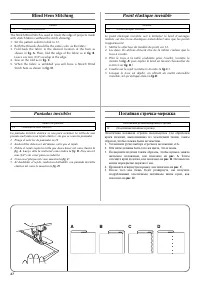
- Página 31 – Blind Hem Stitching; Point élastique invisible; Puntadas invisibles; Потайная строчкаEмережка
- Página 32 – Elastic Stitching; MENDING; JOINING FABRIC; Point élastique; Puntada elástica; Эластичная строчка; РЕМОНТ ТКАНИ; ПРИШИВАНИЕ ЭЛАСТИЧНОЙ ТЕСЬМЫ; СТАЧИВАНИЕ ТКАНЕЙ
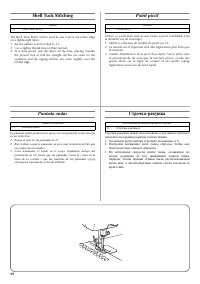
- Página 33 – Shell Tuck Stitching; Point picot; Puntada ondas; СтрочкаEракушка
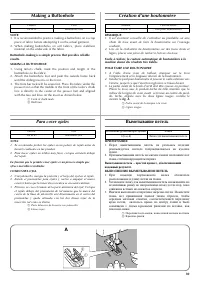
- Página 34 – Making a Buttonhole; MAKING A BUTTONHOLE; Création d’une boutonnière; Para coser ojales; Выметывание петель; ВЫПОЛНЕНИЕ ВЫМЕТЫВАНИЯ ПЕТЕЛЬ
- Página 37 – ЗАКРЕПЛЕНИЕ СТРОЧКИ И ПРОРЕЗКА ПЕТЛИ
- Página 38 – Buttonhole Fine Adjustment; Equilibrage des boutonnières; Ajuste fino de los ojales; Точная настройка при выметывании
- Página 39 – Button Sewing; Pour coudre un bouton; Coser botones; Пришивание пуговиц
- Página 40 – Zipper Insertion; Insertion de fermeture à glissière; Poner de cremalleras; Вшивание застежки «молния»
- Página 41 – Gathering; Pour froncer un tissu; Fruncido; Выполнение сборок
- Página 44 – Monogramming and Embroidering; PREPARING FOR MONOGRAMMING AND EMBROIDERING; Monogrammes et broderies; Monogramas y bordados; Выстрачивание монограмм и вышивание
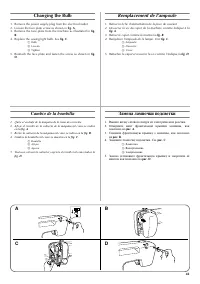
- Página 46 – Changing the Bulb; Remplacement de l’ampoule; Cambio de la bombilla; Замена лампочки подсветки
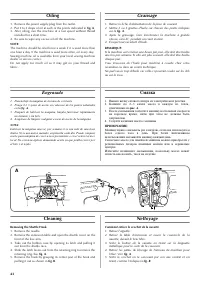
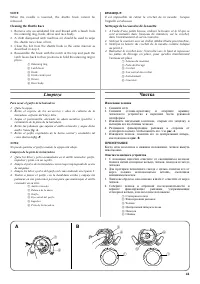
- Página 48 – Cleaning the Shuttle Race; Limpieza; Чистка; Извлечение челнока
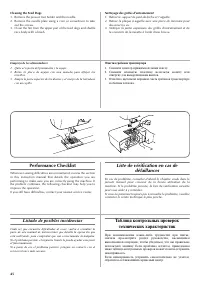
- Página 49 – Cleaning the Feed Dogs; Performance Checklist; Liste de vérification en cas de; Listado de posibles incidencias; Очистка гребенок транспортера; Таблица контрольных проверок
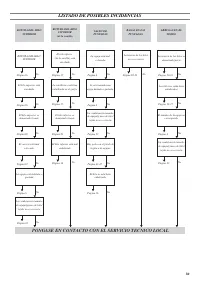
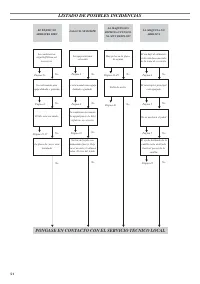
- Página 50 – LISTADO DE POSIBLES INCIDENCIAS; PONGASE EN CONTACTO CON EL SERVICIO TECNICO LOCAL
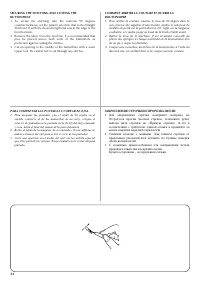
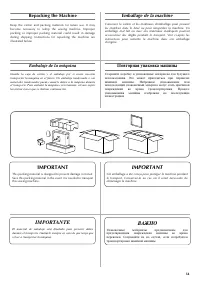
- Página 54 – Repacking the Machine; Emballage de la machine; IMPORTANT; Embalaje de la máquina; IMPORTANTE; Повторная упаковка машины; ВАЖНО
28
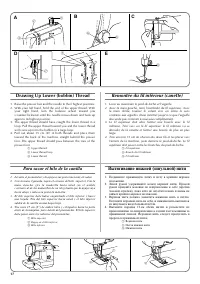
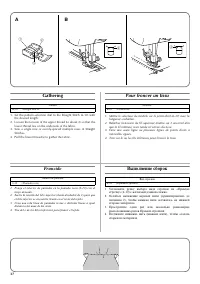
Elastic Stitching
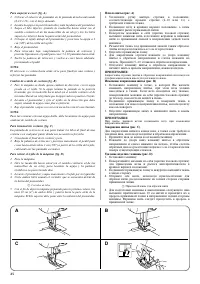
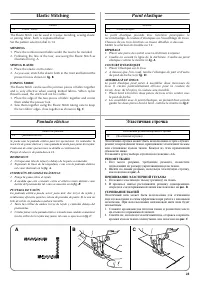
The Elastic Stitch can be used in 3 ways: mending, sewing elastic
or joining fabric. Each is explained below.
Set the pattern selection dial to 14.
MENDING
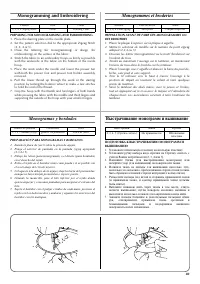
1. Place the reinforcement fabric under the tear to be mended.
2. Following the line of the tear, sew using the Elastic Stitch as
illustrated in fig. A.
SEWING ELASTIC
1. Place the elastic on the fabric.
2. As you sew, stretch the elastic both in the front and behind the
presser foot as shown in
fig. B
.
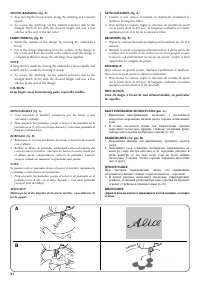
JOINING FABRIC
The Elastic Stitch can be used to join two pieces of fabric together
and is very effective when sewing knitted fabrics. When nylon
thread is used, the stitch will not be visible.
1. Place the edge of the two pieces of fabric together and center
them under the presser foot.
2. Sew them together using the Elastic Stitch taking care to keep
the two fabric edges close together as shown in
fig. C
.
Pattern
14
(Elastic Stitch)
Point élastique
Le point élastique possède trois fonctions principales: le
raccommodage, la couture d’élastiques ou l’assemblage de tissus.
Chacune de ces trois fonctions se trouve détaillée ci-dessous.
Mettre le sélecteur de modèle sur 14.
REPRISAGE
1. Placer une pièce de renfort sous la déchirure à réparer.
2. Coudre en suivant la ligne de la déchirure. Coudre au point
élastique comme le montre la
fig. A
.
COUTURE D’ELASTIQUES
1. Placer l’élastique sur le tissu.
2. A mesure que l’on coud, tendre l’élastique de part et d’autre
du pied-de-biche (voir
fig. B
).
ASSEMBLAGE DE TISSUS
Le point élastique peut servir à assembler deux morceaux de
tissu. Il s’avère particulièrement efficace pour la couture de
tricots. Avec du fil nylon, la couture sera invisible.
1. Placer bord à bord les deux pièces de tissu et les centrer sous
le pied-de-biche.
2. Les assembler avec le point élastique, en prenant bien soin de
garder les deux pièces bord à bord, comme le montre la
fig.C
.
Modèle
14
(Point élastique)
Puntada elástica
Se puede usar la puntada elástica para tres operaciones: los remiendos, la
inserción de gomas elásticas y como puntada de unión para juntar dos tejidos.
Cada una de estas operaciones se detalla a continuación.
Ponga el selector de puntadas en 14.
REMIENDOS
1. Coloque una tela de refuerzo debajo de la parte a remendar.
2. Siguiendo la línea de la rasgadura, cosa con la puntada elástica
tal como ilustrado en la
fig. A
.
INSERCIÓN DE GOMAS ELÁSTICAS
1. Ponga la goma sobre el tejido.
2. A medida que esté cosiendo, estire el elástico tanto delante como
detrás del prensatelas tal como se muestra en la
fig. B
.
PUNTADA DE UNIÓN
La puntada elástica puede servir para unir dos trozos de tejido y
resulta muy eficiente para la costura de prendas de punto. Si se usa un
hilo de nylón, la puntada resultará invisible.
1. Junte las orillas de ambos trozos de tejido y céntrelas debajo del
prensatelas.
2. Cósalas juntas con la puntada elástica, teniendo sumo cuidado en mantener
las dos orillas de los tejidos muy juntas, tal como se aprecia en la
fig. C
.
Número de puntada
14
(puntada elástica)
Эластичная строчка
Эластичная строчка может быть использована в трёх случаях:
ремонт повреждённой ткани, пришивание эластичной тесьмы
или стачивание кусков ткани. Каждое из этих применений
объяснено ниже.
Установите ручку выбора строчки в положение «14».
РЕМОНТ ТКАНИ
1. Под место разрыва, требующее ремонта, поместите
подходящий по размеру укрепляющий кусок ткани.
2. Шейте по линии разрыва, используя эластичную строчку,
как показано на
рис. А
.
ПРИШИВАНИЕ ЭЛАСТИЧНОЙ ТЕСЬМЫ
1. Положите эластичную тесьму (резинку) на ткань.
2. В процессе шитья растягивайте резинку одновременно
спереди и сзади прижимной лапки как показано на
рис. B
.
СТАЧИВАНИЕ ТКАНЕЙ
Эластичный шов может быть использован для стачивания
двух кусков ткани и очень эффективен при работе с вязаными
полотнами. При использовании нейлоновой нити шов будет
незаметным.
1. Сложите кромками два полотна ткани и разместите место
их стыка под прижимной лапкой.
2. Сшейте их, используя эластичный шов, стараясь сохранять
кромки кусков ткани сомкнутыми, как показано на
рис. C
.
Положение ручки выбора вида строчки
14
(Эластичная строчка)
A
B
C
"Cargando la instrucción" significa que debes esperar hasta que el archivo se cargue y puedas leerlo en línea. Algunas instrucciones son muy grandes y el tiempo de carga depende de la velocidad de tu conexión a Internet.
Resumen
INDICE Página ELEMENTOS PRINCIPALES ......................................................... 1 ELEMENTOS PRINCIPALES ......................................................... 2 ACCESORIOS.................................................................................... 3 FUNCIONAMIENTO DE LA MÁQU...
1 1 3 4 5 6 2 L O H I J K M N P 7 8 9 0 A B C E F D G 1 3 4 5 6 2 PRINCIPAL PARTS * The illustrations of the sewing machine on the following pages may differ slightly from your machine. PIECES PRINCIPALES * Les illustrations représentées aux pages suivantes peuvent différer légèrement de votre machi...
2 PRINCIPAL PARTS a Pattern selection dial b Buttonhole fine-adjusting screw c Thread take-up lever d Extension table with accessory storage e Upper tension control dial f Reverse sewing lever g Thread cutter h Presser foot holder assembly i Presser foot screw j Presser foot (Zigzag) k Needle plate ...
Otros modelos de máquinas de coser Brother
-
 Brother JS-23
-
 Brother LS 2150
-
 Brother LS-1520
-
 Brother LS-2125
-
 Brother LS-3125
-
 Brother SL-7
-
 Brother SM2700
-
 Brother ST4031HD