Monogram ZIR361NPRII - Manual de uso - Página 12
Frigorífico Monogram ZIR361NPRII - Manual de uso, léela gratuitamente en línea en formato PDF. Esperamos que esto te ayude a resolver cualquier duda que puedas tener. Si tienes más preguntas, contáctanos a través del formulario de contacto.


Índice:
- Página 2 – ANTES DE COMENZAR; IMPORTANTE; PRECAUCIÓN; ADVERTENCIA; FORMA ADECUADA DE DESCARTAR SU ELECTRODOMÉSTICO
- Página 4 – Installation Instructions - Reversing the Door Swing; WARNING; Risque de
- Página 5 – STEP 2 REMOVE DOOR; Door Hinge Pinch
- Página 8 – STEP 4 INSTALL ANTI-TIP BRACKET; Dual install
- Página 9 – Electrical Shock Hazard.; Trisque de
- Página 10 – ON; STEP 12 START ICEMAKER; OFF; CAUTION; ATTENTION
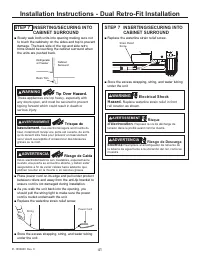
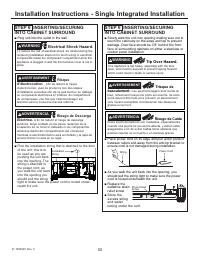
- Página 13 – STEP 7 INSERTING/SECURING INTO
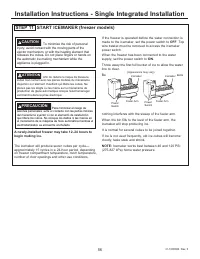
- Página 17 – STEP 11 START ICEMAKER (freezer models)
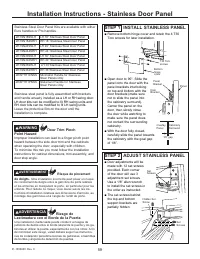
- Página 19 – Installation Instructions - Stainless Door Panel; Door Trim Pinch; STEP 1 INSTALL STAINLESS PANEL; Risque de pincement
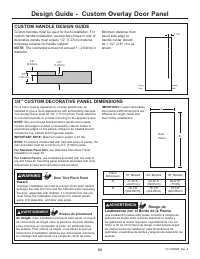
- Página 21 – /4” CUSTOM DECORATIVE PANEL DIMENSIONS; Design Guide - Custom Overlay Door Panel; CUSTOM HANDLE DESIGN GUIDE; Door Trim Pinch Point
39
31-1000600 Rev. 0
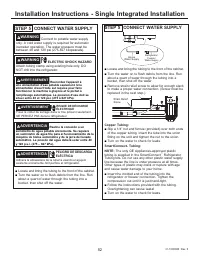
Installation Instructions - Dual Retro-Fit Installation
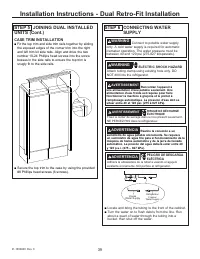
STEP 6 CONNECTING WATER
SUPPLY
Ŷ
Locate and bring the tubing to the front of the cabinet.
Ŷ
Turn the water on to flush debris from the line. Run
about a quart of water through the tubing into a
bucket, then shut off the water.
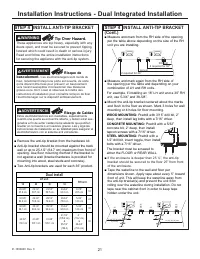
STEP 5 JOINING DUAL INSTALLED
UNITS (Cont.)
CASE TRIM INSTALLATION
Ŷ
Fit the top trim and side trim rails together by sliding
the exposed edges of the corner trim into the right
and left trim kit side rails. Align and drive the two
number 10-24 Phillips head screws into the screw
bosses in the side rails to ensure the top trim is
snugly fit to the side rails.
Ŷ
Secure the top trim to the case by using the provided
#8 Phillips head screws (6 screws).
Freezer
Water Supply
House
Water Supply
Refrigerator/
Freezer
Water Supply
WARNING
Connect to potable water supply
only. A cold water supply is required for automatic
icemaker operation. The water pressure must be
between 40 and 120 psi (275-827 kilopascals).
WARNING
ELECTRIC SHOCK HAZARD
Attach tubing clamp using existing hole only. DO
NOT drill into the refrigerator.
AVERTISSEMENT
Raccordez l’appareil à
une alimentation d’eau potable seulement. Une
alimentation d’eau froide est requise pour faire
fonctionner la machine à glaçons et le pichet à
remplissage automatique. La pression d’eau doit se
situer entre 40 et 120 psi. (275 à 827 kPa).
AVERTISSEMENT
RISQUE DE DÉCHARGE
ÉLECTRIQUE
Fixez le collier de serrage dans le trou présent seulement.
NE PERCEZ PAS dans le réfrigérateur.
ADVERTENCIA
Realice la conexión a un
suministro de agua potable únicamente. Se requiere
un suministro de agua fría para el funcionamiento de la
máquina de hielos automática y de la jarra de llenado
automático. La presión del agua deberá estar entre 40
y 120 p.s.i. (275 – 827 kPa).
ADVERTENCIA
PELIGRO DE DESCARGA
ELÉCTRICA
Adhiera la abrazadera de la tubería usando el agujero
existente únicamente. NO perfore el refrigerador.
"Cargando la instrucción" significa que debes esperar hasta que el archivo se cargue y puedas leerlo en línea. Algunas instrucciones son muy grandes y el tiempo de carga depende de la velocidad de tu conexión a Internet.
Resumen
4 31-1000600 Rev. 0 Safety Information ANTES DE COMENZAR Lea estas instrucciones en su totalidad y atentamente. • IMPORTANTE – Conserve estas instrucciones para uso del inspector local. Cumpla con todos los códigos y ordenanzas gubernamentales. • Nota para el Instalador – Asegúrese de que el Com...
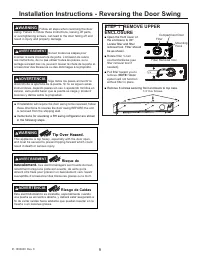
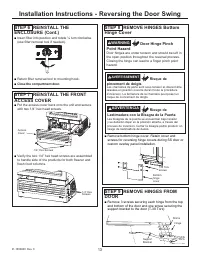
9 31-1000600 Rev. 0 Installation Instructions - Reversing the Door Swing STEP 1 REMOVE UPPER ENCLOSURE Ŷ Open the front cover of the enclosure to 90°. Locate filter and filter removal tool. Filter should be as shown. Ŷ 5RWDWH¿OWHUóWXUQ counterclockwise (use ¿OWHUUHPRYDOWRROLI needed). Ŷ 3XOO¿OWHUWR...
10 31-1000600 Rev. 0 Installation Instructions - Reversing the Door Swing STEP 2 REMOVE DOOR Ŷ Open the door to the open position. Ŷ Have a second person support the open door. Ŷ Remove 2 T30 Torx screws securing the bottom hinge to the case. Ŷ Remove the 2 T30 Torx screws securing the top hinge...